Overview
The Cylinder Break Tracking screen allows you to log and manage cylinder break data.
Required Configuration / Setup
Before the Cylinder Break Tracking screen can be used, data must be entered in the following screens. All screens can be found in Configuration > Quality Control Setup from the main menu.
Accessing the Cylinder Break Tracking Screen
Navigate to Quality Control > Cylinder Break Tracking from the main menu (Figure 1).
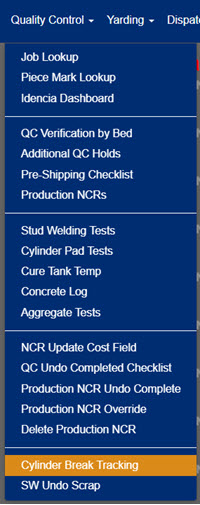
Figure 1
Viewing the Cylinder Break Tracking Screen
The Cylinder Break Tracking screen will first load with only the Filter tab and "Select a plant" visible. To view the cylinder break grid:
- Click the Filter tab (yellow box in Figure 2).
- Select a plant location from the dropdown (green arrow in Figure 3).
- Select No, Yes, or Both for the "Include Completed Breaks" question (green arrow in Figure 3).
- Click the Search button (green box in Figure 3).
Note: After the Cylinder Break Tracking screen loads, the full grid is viewed by scrolling horizontally (blue arrows in Figures 4 and 5).

Figure 2
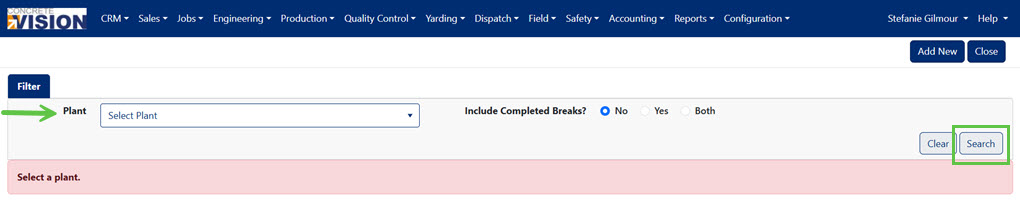
Figure 3
Understanding the Cylinder Break Tracking Screen
The following function are available on the Cylinder Break Tracking screen (Figure 4 and 5):
- Click the Add New button to add a new Batch (green box in Figure 4).
- Click the Edit icon (yellow box in Figure 4) to edit a Batch.
- Click the Hammer icon (purple box in Figure 4) to enter Cylinder Break Details.
- Click the Delete icon (red box in Figure 4) to delete a Batch.
- Overdue break details are highlighted in yellow (Figure 5).
- Click the Funnel icon (red box in Figure 5) to filter the grid.
- Click the column headings (green box in Figure 5) to sort the grid.
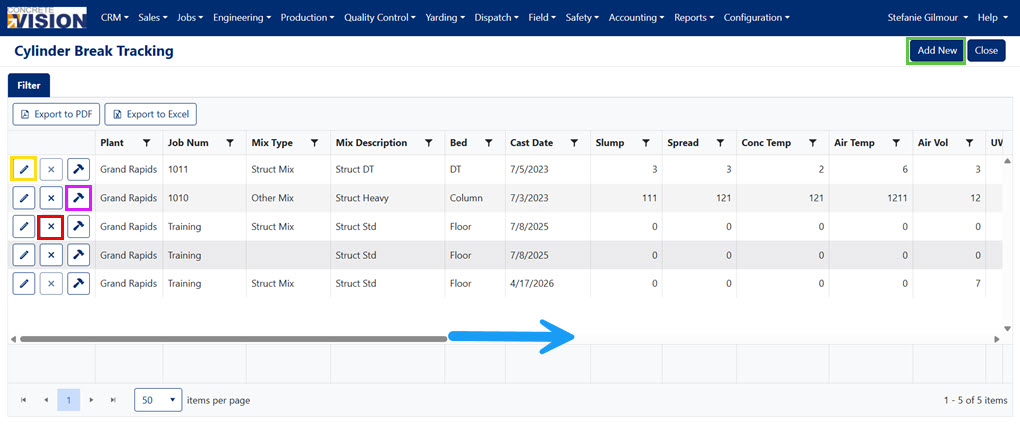
Figure 4
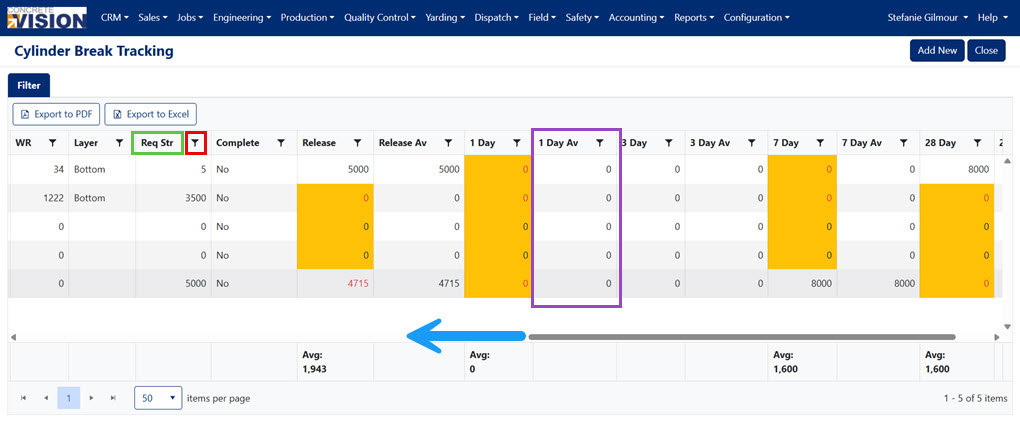
Figure 5
Adding a New Batch
A batch must be created before cylinder break tracking can be logged for that batch. From the Cylinder Break Tracking screen (Figure 4):
- Click the Add New button (green box in Figure 4). The Create Batch screen will display (Figure 6).
- Fill in the new batch details. Selections from dropdown menus may populate the next menu (yellow box in Figure 6)
- Click the Save button (green box in Figure 6) to save the batch details or the Save & Close button (green box in Figure 6) to save and return to the Cylinder Break Tracking screen (Figure 4).
Note:
- The cast date and time will be used to fill in the Sample Date.
- The Supervisor, Team Lead, Pre Pour Inspector, and Post Pour Inspector will automatically fill in if the values are entered for the bed in production planning (purple box in Figure 8).
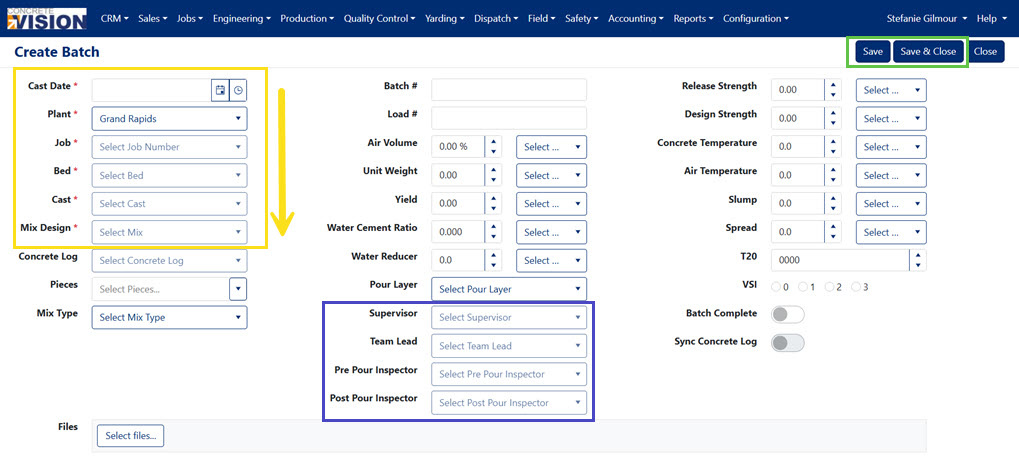
Figure 6
Sync Concrete Log (new September 2025)
- A concrete log must be selected.
- Pulls in any Concrete Log data that coincides with the batch and update the Concrete Log if changes are made here. Later changes to the concrete log are not automatically synced here.
- Click the slider button to turn the sync on or off.
- Break Details will be created from sample information entered on the Concrete Log, if no break details exist.
- If the batch is synced with the Concrete Log, the Concrete Log Test Date & Time will be used to fill in the Sample Date & Time.
WARNING!! When synced from the Concrete Log, there is insufficient data to fully create a break detail. At a minimum, you will need to select the Shear Type (Red notes, Figure 7)
Editing a Batch
From the Cylinder Break Tracking screen (Figure 4):
- Click the Edit icon (yellow box in Figure 4). The Edit Batch screen will display (Figure 7).
- Make any needed edits.
- Click the Save button to save the batch detail edits or the Save & Close button to save and return to the Cylinder Break Tracking screen (Figure 4).
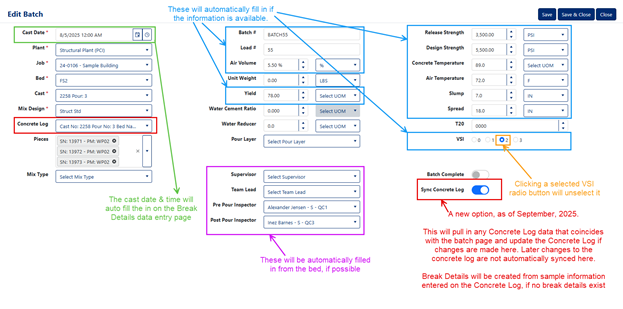
Figure 7
Deleting a Batch
From the Cylinder Break Tracking screen (Figure 4):
- Click the Delete icon (red box in Figure 4).
- A pop up will appear to confirm deletion.
- Click Okay.
Note: A batch cannot be deleted if break details are logged within it.
Logging Cylinder Break Details
From the Cylinder Break Tracking screen (Figure 4):
- Click the Hammer icon (purple box in Figure 4). The Break Details screen will display (Figure 8).
- Click the Add new record button (red box in Figure 8). A pop up will display to add break details (Figure 9).
- Select the Break Type. (set up in Config > Quality Control Setup > Cylinder Break Types)
- The Sample Date will automatically fill from the Batch info.
- The Break Date will automatically fill using the Sample Date and adding the number of Reminder Days for the Break. (set up in Config > Quality Control Setup > Cylinder Break Types)
- Select the Shear Type.
- Enter any measurements to track.
- Area In2 is automatically calculated using the average of Dia 1 In and Dia 2 In (the diameters) values.
- The Compressive Lbs field is displayed on the Break Tracking grid and used to calculate averages.
- PSI is automatically calculated using the Area In2 and the Compressive Lbs values.
- Click the Save button (Figure 9) to save break details.
WARNING!!
- If the PSI is entered manually, the Diameters and Area will be set to 0 and disabled. Clearing the PSI will allow reentry to those fields.
- When synced from the Concrete Log, there is insufficient data to fully create a break detail. At a minimum, you will need to select the Shear Type.

Figure 8
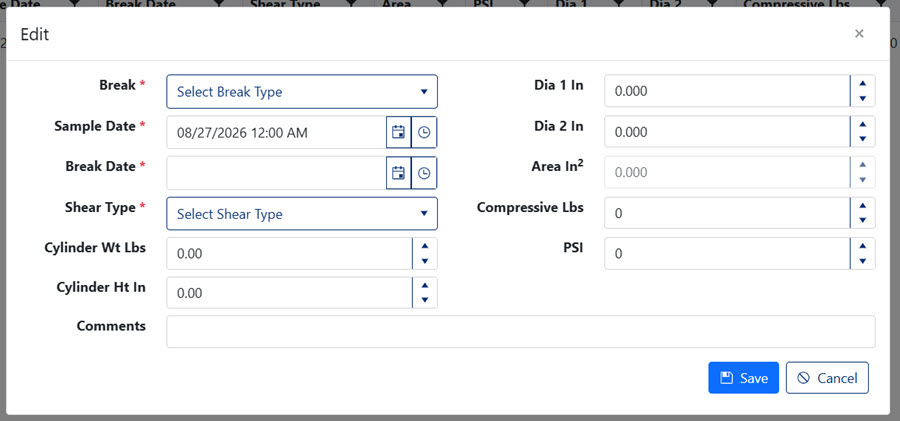
Figure 9
Export and Report Cylinder Break Tracking
The Cylinder Break Tracking screen can be exported as a pdf or an Excel file.
- Click [Export to PDF] for a formatted document (Green box, Figure 10)
- Click [Export to Excel] for a spreadsheet you can edit (Green box, Figure 10)
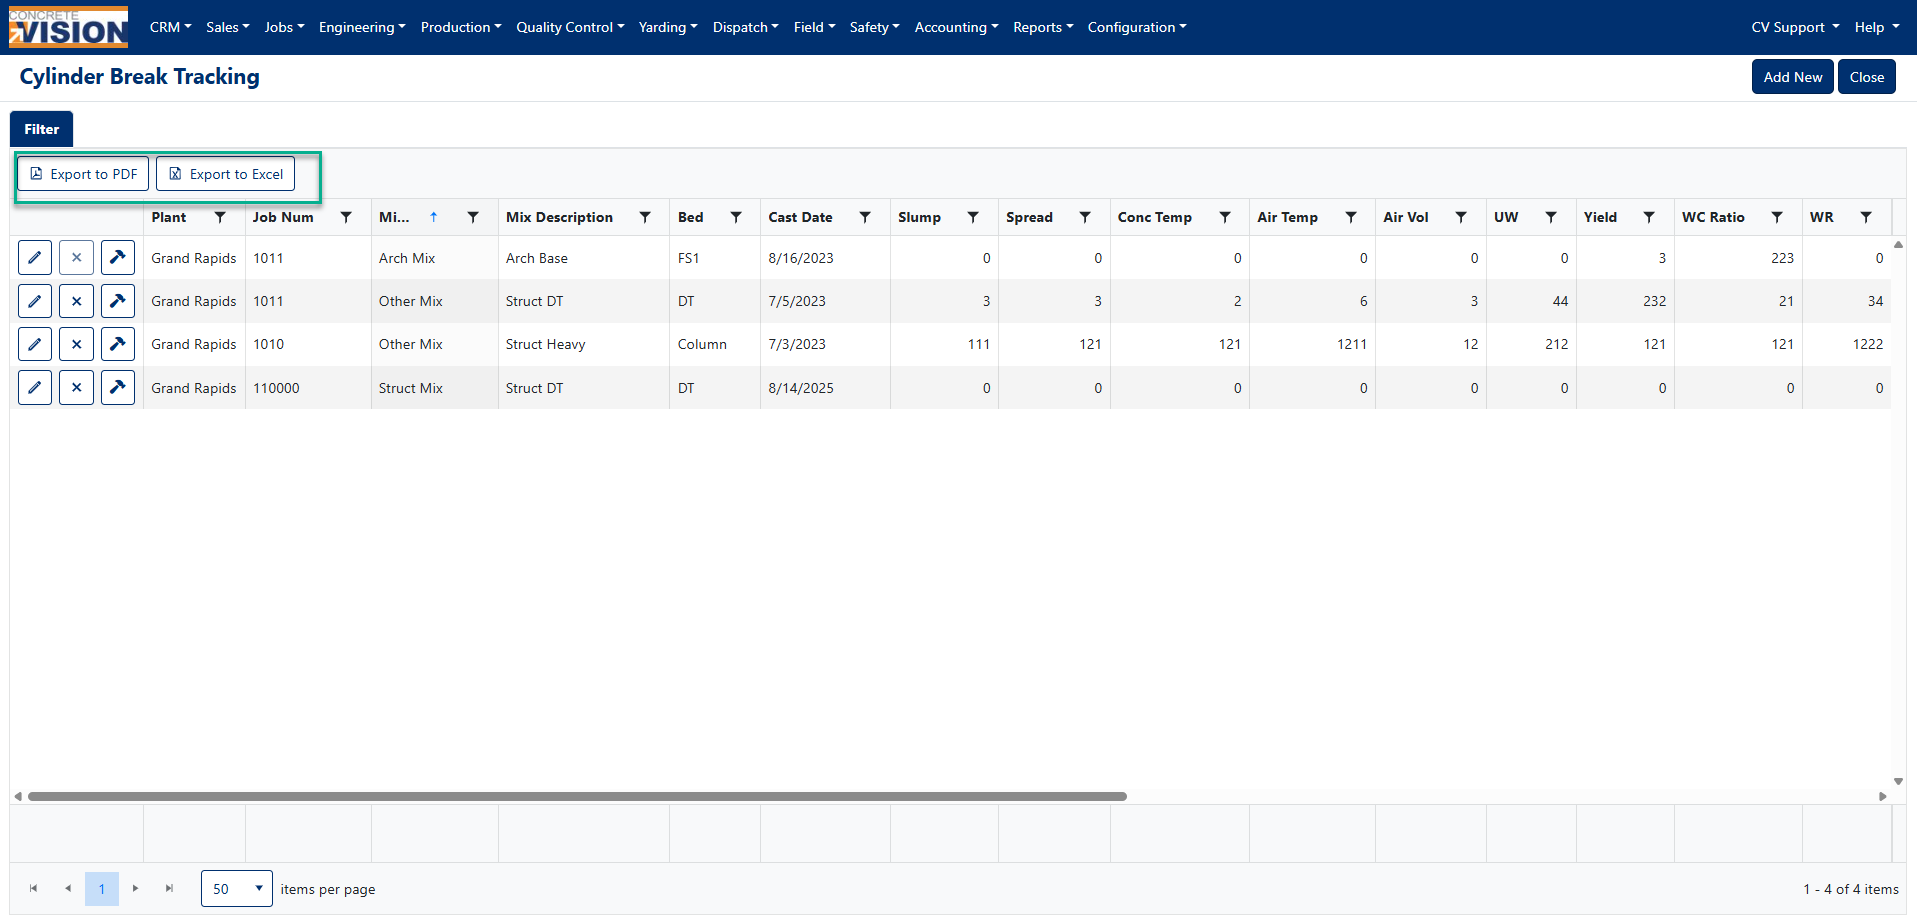
Figure 10
Export and Report Cylinder Break Details
The Cylinder Break Details screen can be exported as a pdf or an Excel file.
- Click [Export to PDF] to export the tracking details (Orange box, Figure 12).
- Click [Export to Excel] for a spreadsheet of tracking details (Orange box, Figure 12).

Figure 12
Was this article helpful?
That’s Great!
Thank you for your feedback
Sorry! We couldn't be helpful
Thank you for your feedback
Feedback sent
We appreciate your effort and will try to fix the article