Overview
Estimated product codes (types) and details are added through the Phases tab in the Jobs Module. At least one phase must exist for a job to move through Concrete Vision.
Accessing the Job Phases Screen
1. Navigate to Job > Job Lookup from the main menu (Figure 1).
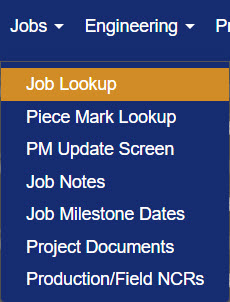
Figure 1
2. On the Job Search screen, click the Edit icon beside the job estimate number (Green box, Figure 2).
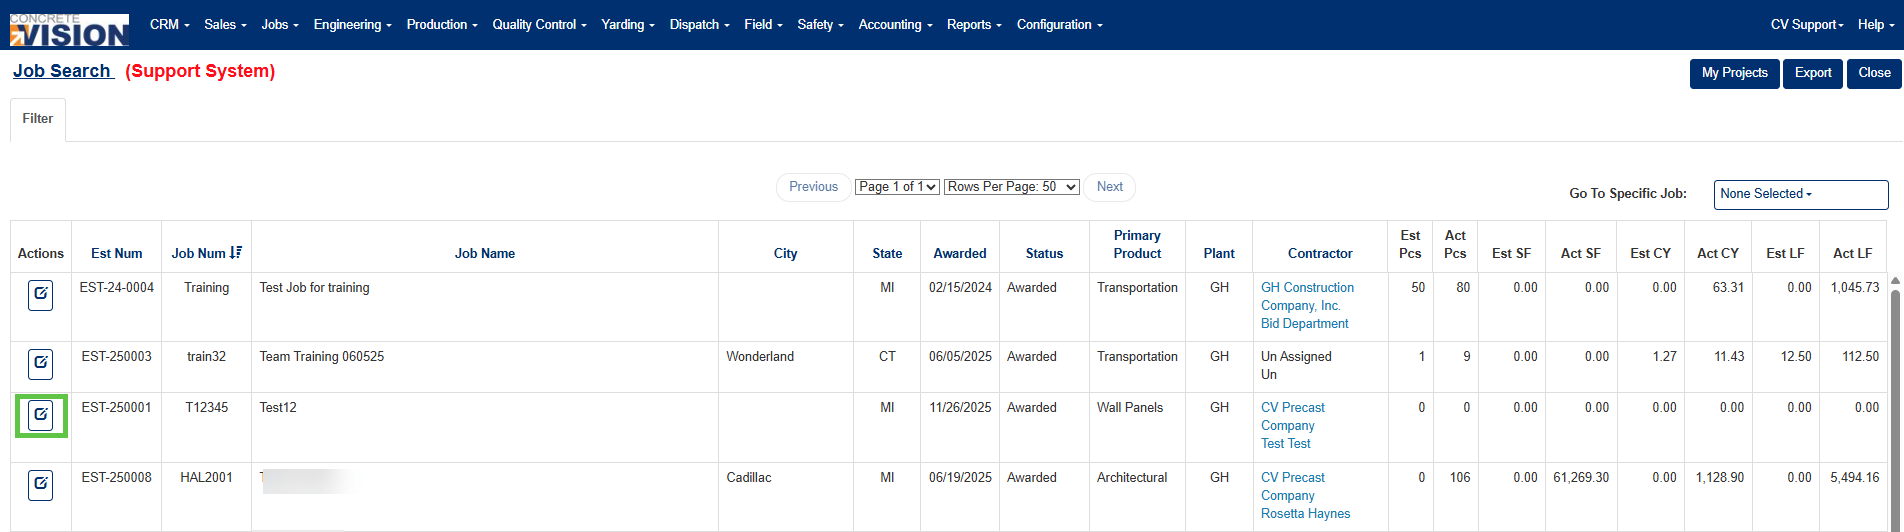
Figure 2
3.From the Job Information screen, select the Phases tab (Green box, Figure 3).
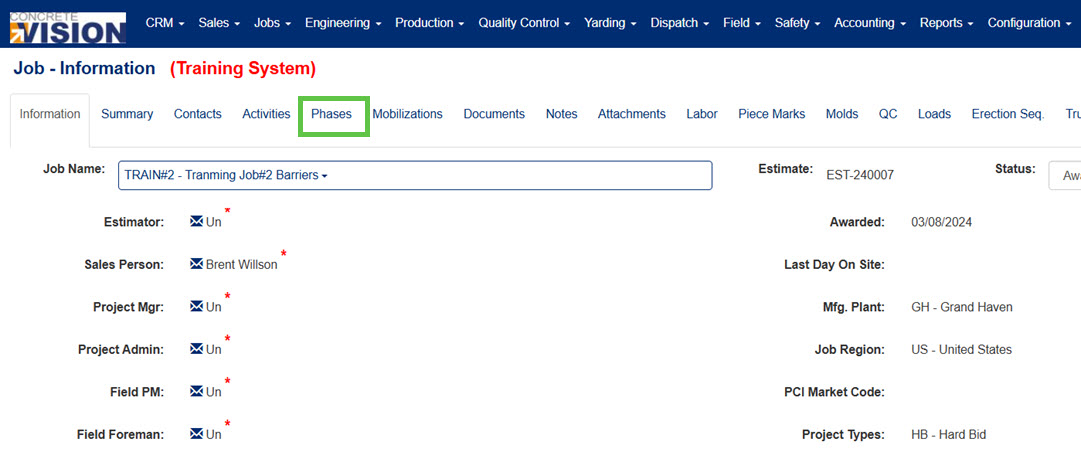
Figure 3
Using the Jobs Phases Screen
The number of phases within a job is determined by the project needs, but at least one phase must exist for a job to move through Concrete Vision.
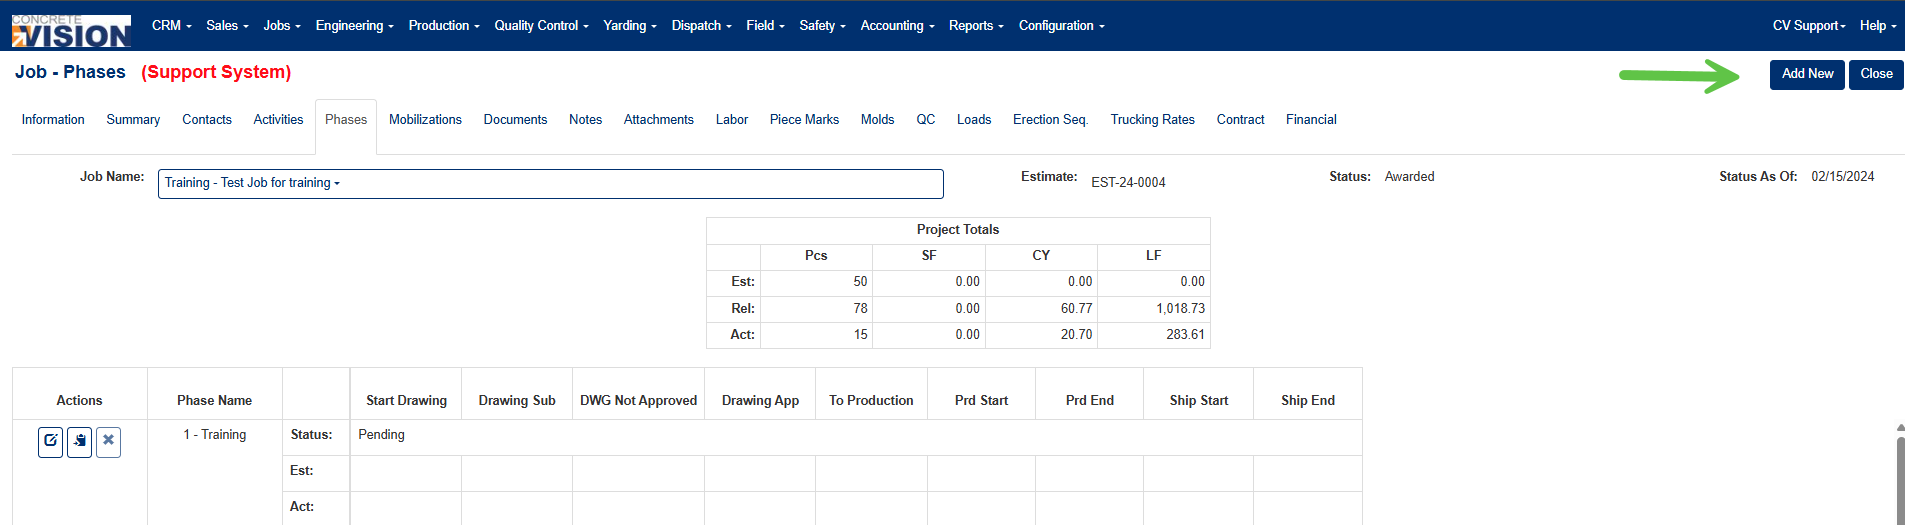
Figure 4
Adding a Phase to a Job
- Click the Add New button on the Job - Phases screen (Green box, Figure 4). The Job - Edit Phase screen will load (Figure 5).
- Fill in the field for Phase Number (Yellow arrow, Figure 5).
- Fill in the field for Phase Name (Blue arrow, Figure 5).
- Click the Save or Save&Close button to apply changes (Green box, Figure 5).
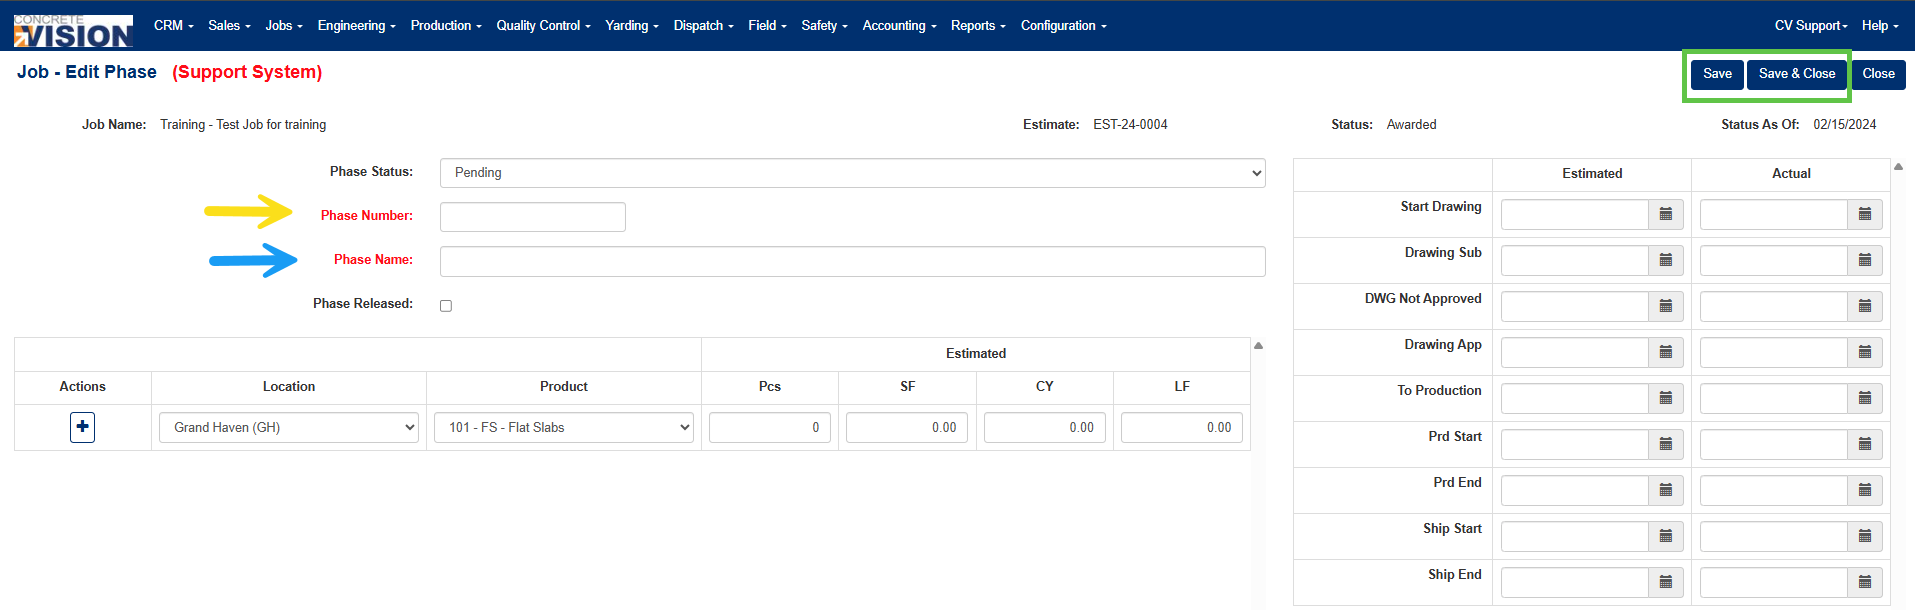
Figure 5
Adding a Product Code (Type) to a Phase
Estimated product code (type) / code details (Yellow box, Figure 6) are added to a job phase from the Job - Edit Phase screen (Figure 6).
- Select the plant from the Location dropdown.
- Select the estimated product code (type) from the Product dropdown.
- Enter the estimated number of pieces for the product code (type).
- Enter estimated amount of square feet, cubic yards, or linear feet of concrete.
- Click the Plus icon (green arrow in Figure 6) to the left of the completed line.
- Click the Save or Save & Close button to apply changes (Green box, Figure 6) at the top right.
Note: The Plus icon must be clicked after the product code (type) details are added, or they will not be saved to the phase.
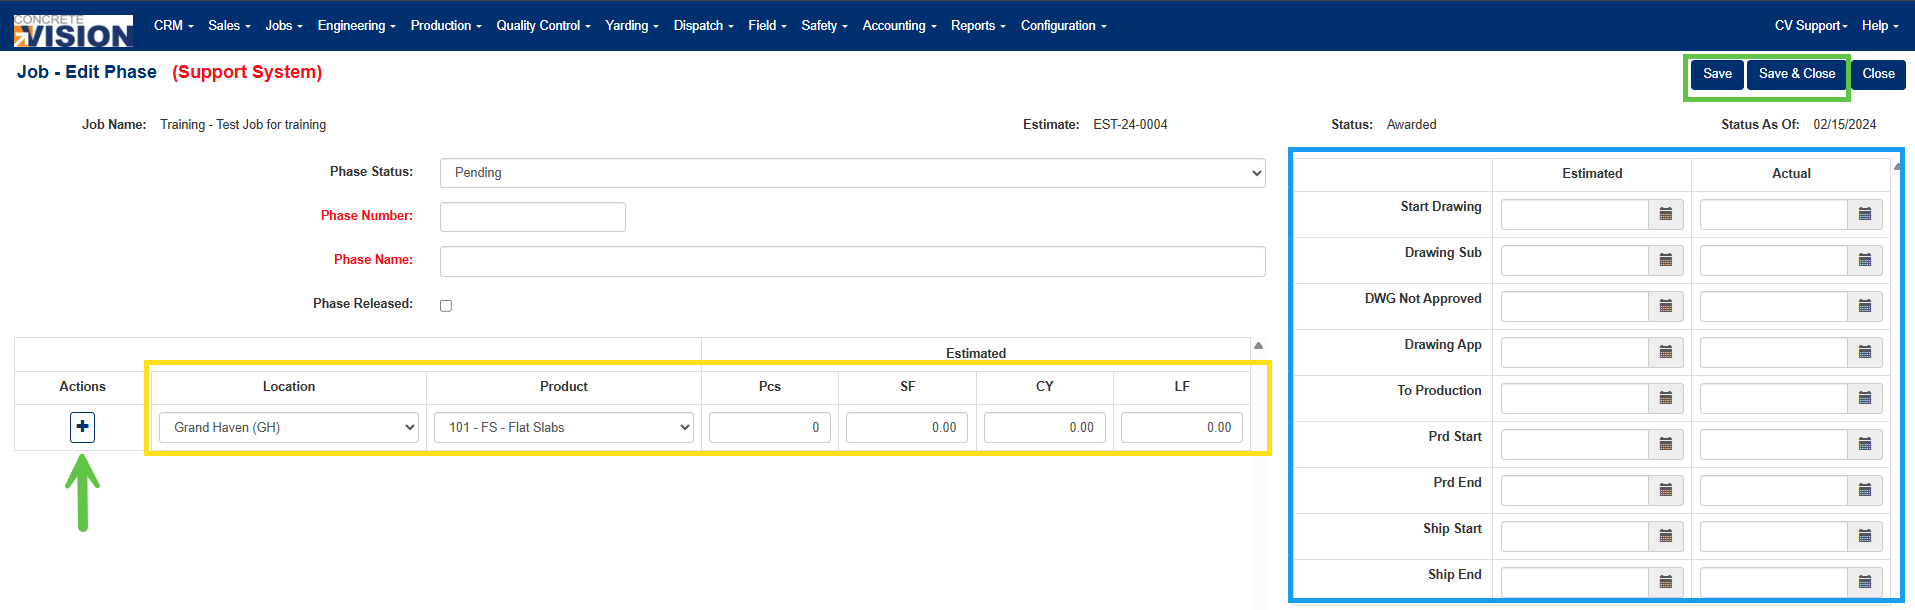
Figure 6
Adding Estimated and Actual Dates to a Phase
Estimated and actual dates for the following phase benchmarks can be recorded within each phase:
- Start Drawing
- Drawing Submission
- Drawing Not Approved
- Drawing Approved
- To Production
- Production Start
- Production End
- Shipping Start
- Shipping End
To record the dates:
- Access the Job - Edit Phase screen (Figure 6).
- Select the dates from the date fields (Blue box, Figure 6).
- Click the Save or Save & Close button (Green box, Figure 6).
Editing a Job Phase
From the Job - Phases screen:
- Click the Edit icon of the Phase Name (Green box, Figure 7).
- Edit as needed on the Job - Edit Phase screen (Figure 6).
- Click the Save or Save & Close button to apply the changes (Green box, Figure 6).
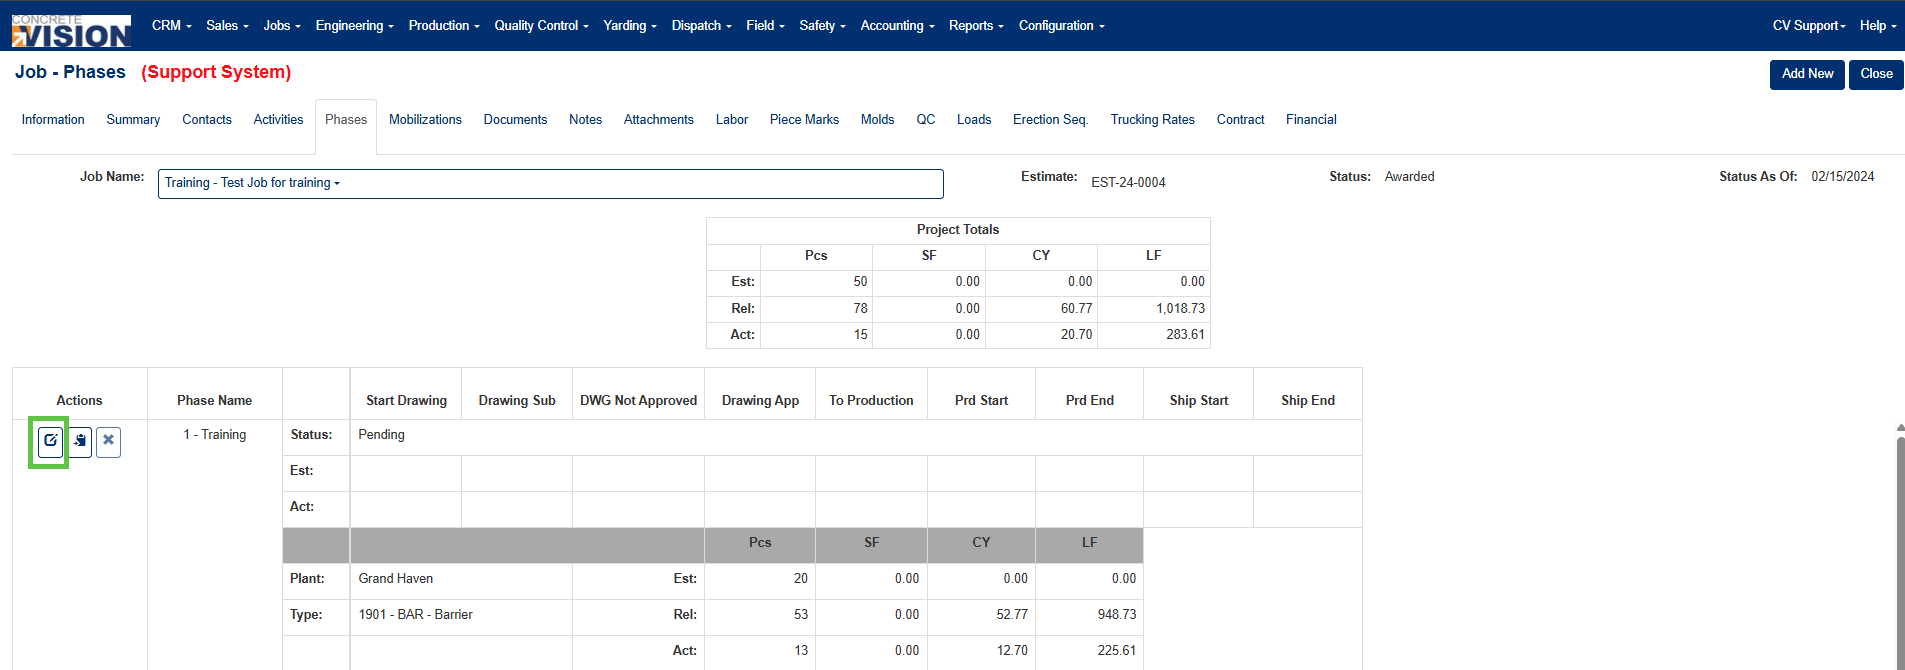
Figure 7
Was this article helpful?
That’s Great!
Thank you for your feedback
Sorry! We couldn't be helpful
Thank you for your feedback
Feedback sent
We appreciate your effort and will try to fix the article