Overview
The Fuel Surcharge screen is used to add a fuel surcharge to loads depending on Plant Location and/or Carrier, and the date the load was delivered.
Accessing the Screen
Navigate to the Accounting > Fuel Surcharge from the main menu (Figure 1).
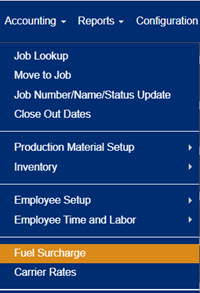
Figure 1
Using the Fuel Surcharge Screen
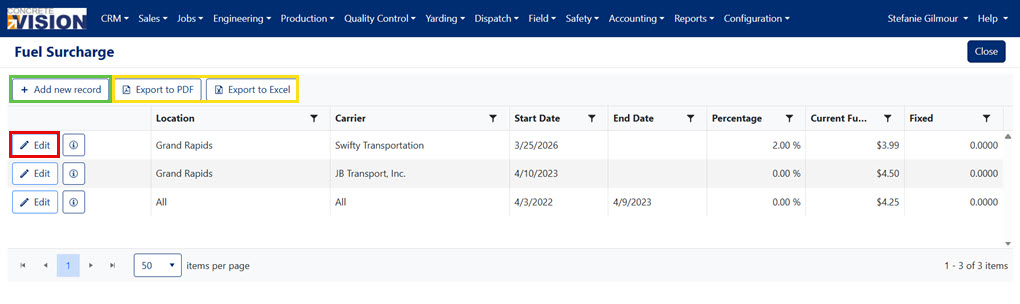
Figure 2
Add a New Fuel Surcharge
From the Fuel Surcharge screen (Figure 2):
- Click the Add New Record button (green box in Figure 2). A new row will display at the top of the table with blank fields (green box in Figure 3).
- Select a plant Location from the dropdown.
- Select a Carrier from the dropdown.
- Select a Start Date (Must be after the previous start date)
- Set a Percentage (Must be a non negative number)
- Set the Current Fuel Price (Must be a non negative number)
- Fixed (Must be a non negative number)
- Click the Save button (yellow arrow in Figure 3).
Note: When setting a new surcharge for a carrier that already has a surcharge listed in the table, the start date for the new surcharge sets the end date for the carrier's previous surcharge to the previous day.
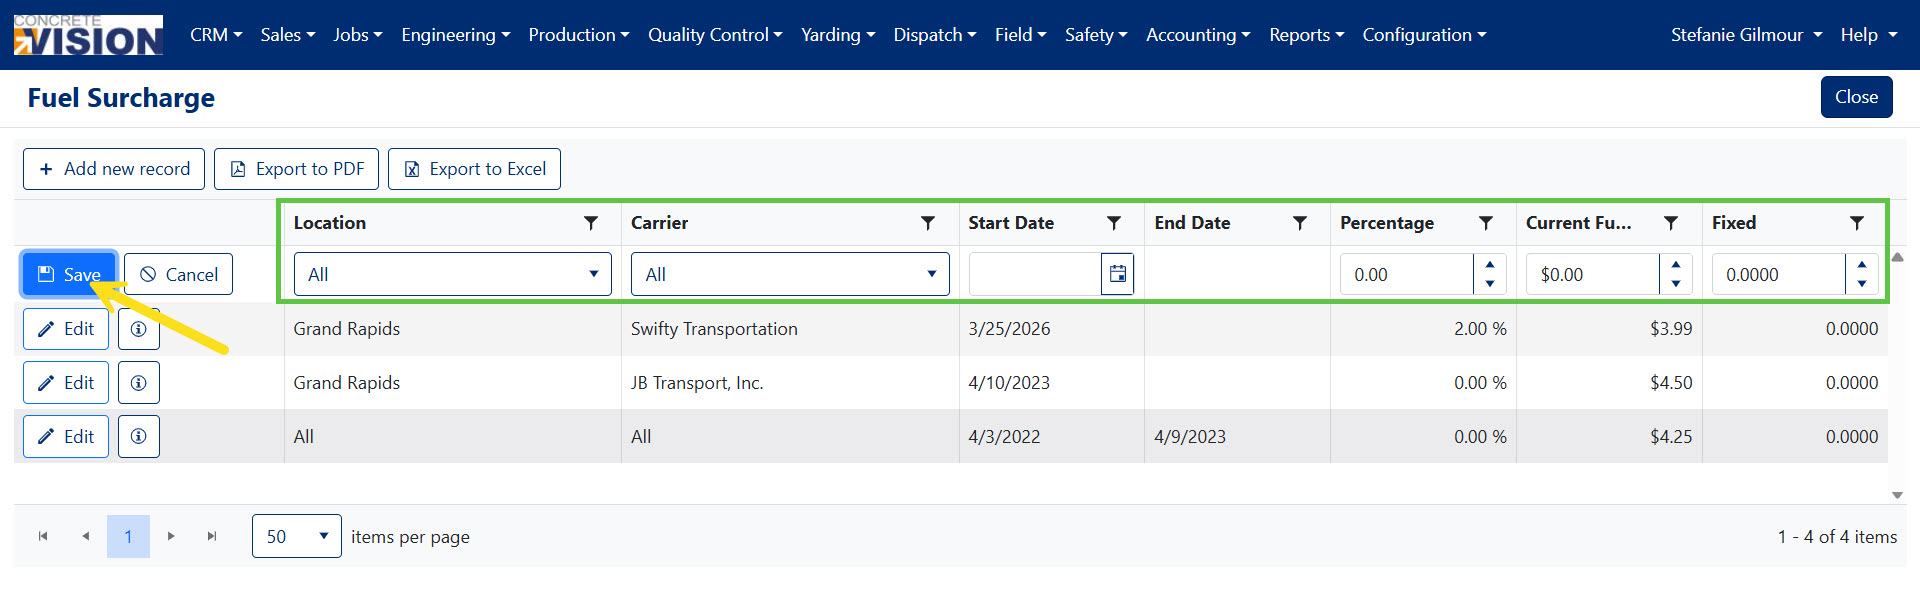
Figure 3
Edit a Fuel Surcharge
Only the Location, Carrier, Percent, Current Fuel Price, and Fixed of a previous surcharge can be edited.
- Click the Edit button (red box in Figure 2).
- Edit the field(s).
- Click the Save button (yellow arrow in Figure 3).
Export the Fuel Surcharges
The fuel surcharges table can be exported (yellow box in Figure 2) from Concrete Vision.
- Click the Export to PDF button to download a pdf of the table.
- Click the Export to Excel button to download an Excel file of the table.
Was this article helpful?
That’s Great!
Thank you for your feedback
Sorry! We couldn't be helpful
Thank you for your feedback
Feedback sent
We appreciate your effort and will try to fix the article