Overview
The Concrete Log screen (Figure 2) is where you can view and edit a concrete log.
Accessing the Screen
Navigate to Quality Control > Concrete Log from the main menu (Figure 1).
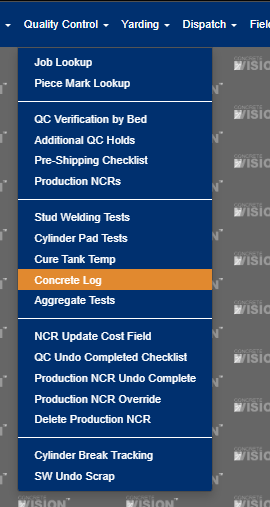
Figure 1
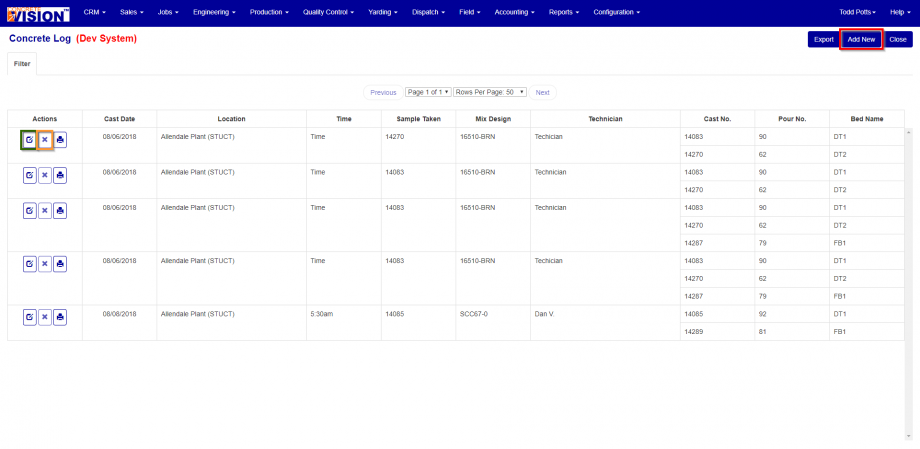
Figure 2
Add a New Concrete Log
From the Concrete Log screen (Figure 2):
- Click the Add New button (red box in Figure 2). The Add New pop up window will display (Figure 3).
- Enter a Pour Date (Required).
- Select a Plant (Required) from the dropdown.
- Enter a Time.
- Enter a Technician.
- Click the Add New button. The Concrete Log - Edit screen will display (Figure 4).
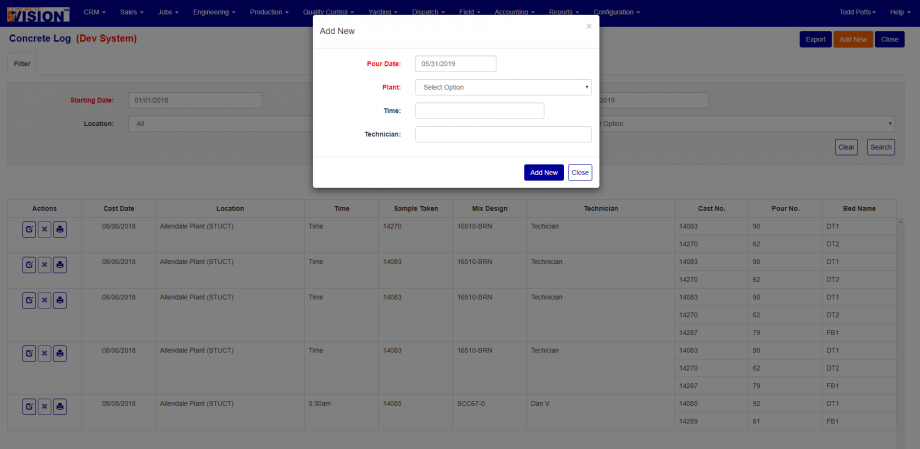
Figure 3
Edit a Concrete Log
From the Concrete Log screen (Figure 2):
- Click the Edit icon next to the concrete log to modify. The Concrete Log - Edit screen will display (Figure 4).
- Update any one of the column values.
- Click the Save button to save changes or the Save & Close button to save changes and return to the Concrete Log screen.
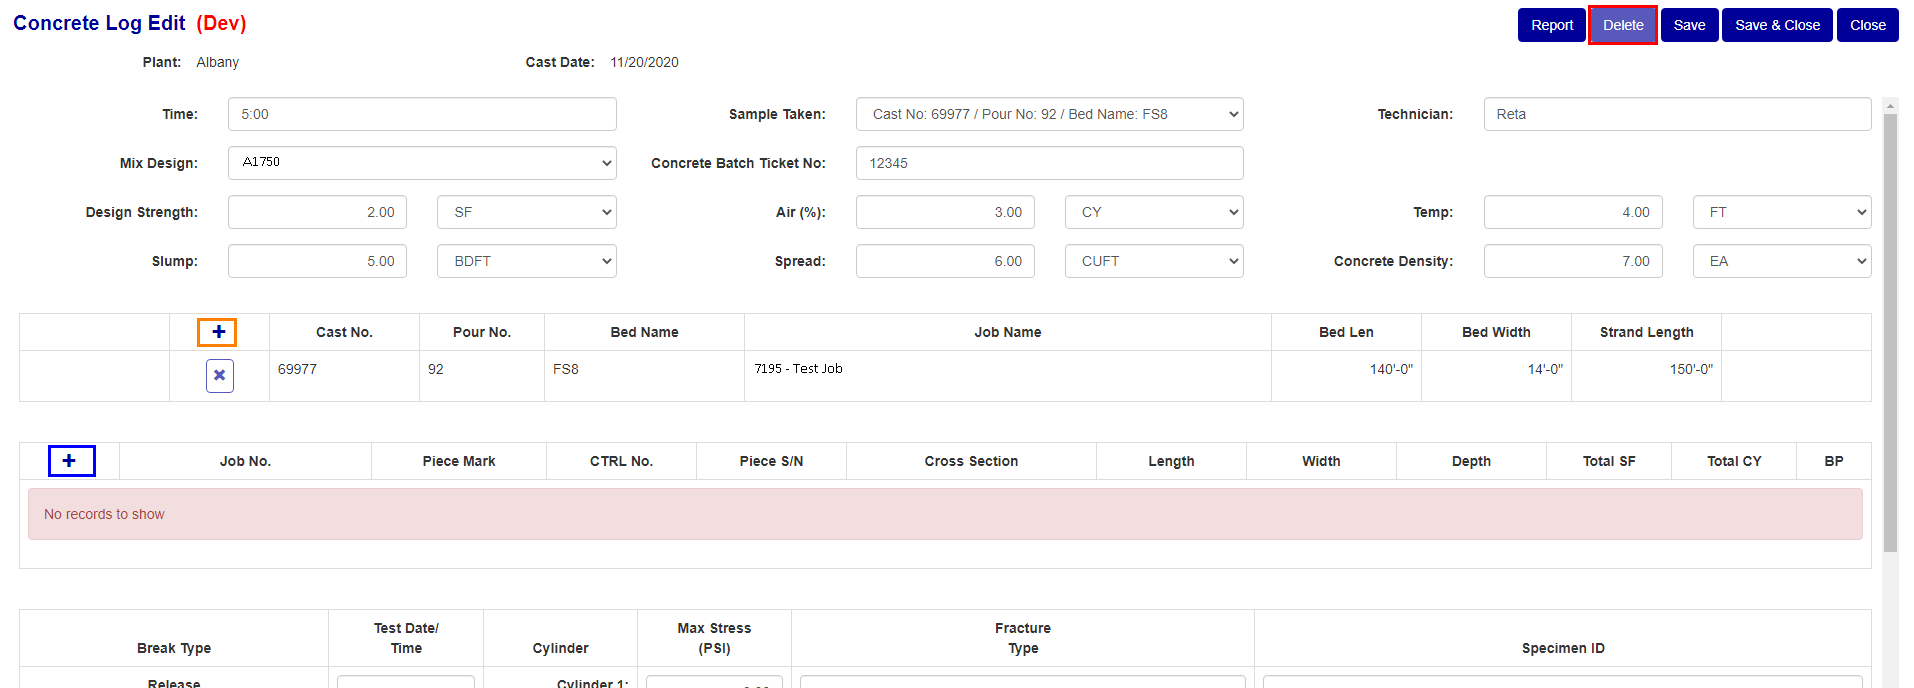
Figure 4
Delete a Concrete Log
From the Concrete Log screen (Figure 2):
- Click the Delete icon (orange box in Figure 2).
- Click Okay to confirm deletion of log.
From the Concrete Log - Edit screen (Figure 4):
- Click the Delete icon (red box in Figure 4).
- Click Okay to confirm deletion of log.
Note: If a concrete log has a bed assigned to it, the delete button will be disabled.
Add Beds to a Concrete Log
From the Concrete Log - Edit screen (Figure 4):
- Click on the top plus button (Orange box in Figure 4). The Concrete Log - Add Bed screen will display.
- Click the checkbox next to the bed (Figure 5) to add to the log.
- Click the Save button to save changes or the Save & Close button to save changes and return to the Concrete Log Edit screen.
On the Add bed screen all beds that have the bed date selected when you created the bed will be show.
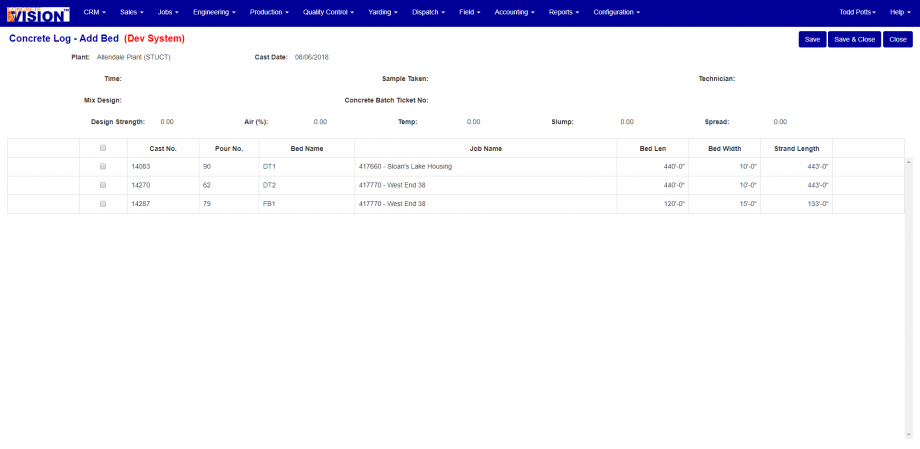
Figure 5
Delete a Bed from a Concrete Log
From the Concrete Log - Edit screen (Figure 4):
- Click the Delete icon (red box in Figure 6) in the beds section of the screen.
- Click Okay to confirm deletion of the bed.
Note: Only beds that don’t have any pieces that are in the concrete log can be deleted.
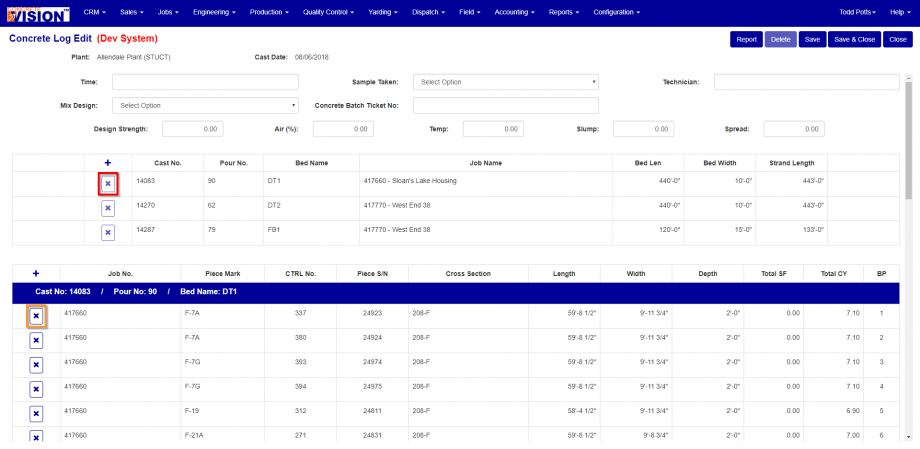
Figure 6
Add Pieces to a Concrete Log
From the Concrete Log - Edit screen (Figure 4):
- Click on the bottom plus button (blue box in Figure 4). The Concrete Log - Add Pieces screen will display
- Click the checkbox next to the piece (Figure 6) to add to the log.
- Click the Save button to save changes or the Save & Close button to save changes and return to the Concrete Log Edit screen.
On the add pieces screen you will get a list of all of the pieces for the beds that you selected under the add beds screen.
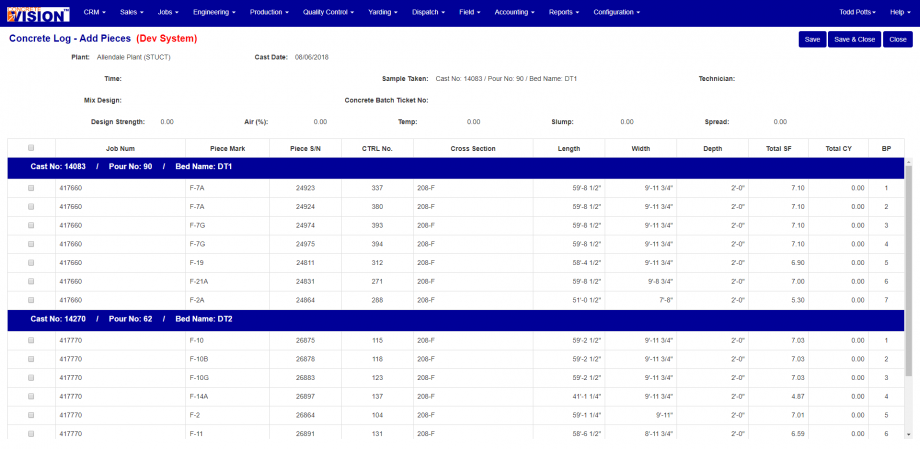
Figure 7
Delete a Piece from a Concrete Log
From the Concrete Log - Edit screen (Figure 4):
- Click the Delete icon (red box in Figure 6) in the pieces section of the screen.
- Click Okay to confirm deletion of the piece.
Was this article helpful?
That’s Great!
Thank you for your feedback
Sorry! We couldn't be helpful
Thank you for your feedback
Feedback sent
We appreciate your effort and will try to fix the article