Overview
Email Events are part of the System Setup in the Configuration module. Certain events or actions taken in Concrete Vision triggers email to send. Email events configures what the content of those emails will be, and who will receive them.
Accessing the Email Events Screen
Navigate to Configuration > System Setup > Email Events from the main menu (Figure 1).
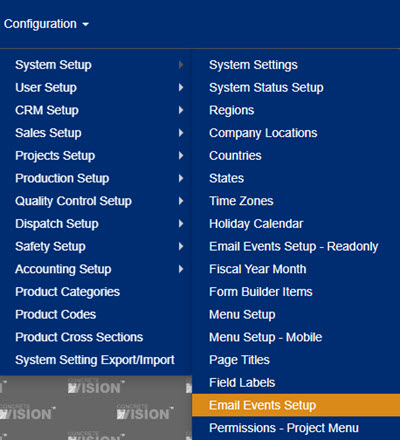
Figure 1
Selecting the Module
The first Email Events Setup screen (Figure 2) will display a list of the Concrete Vision modules.
- Select the View icon (green arrow in Figure 2) next to the module name to view Email Events within that module.
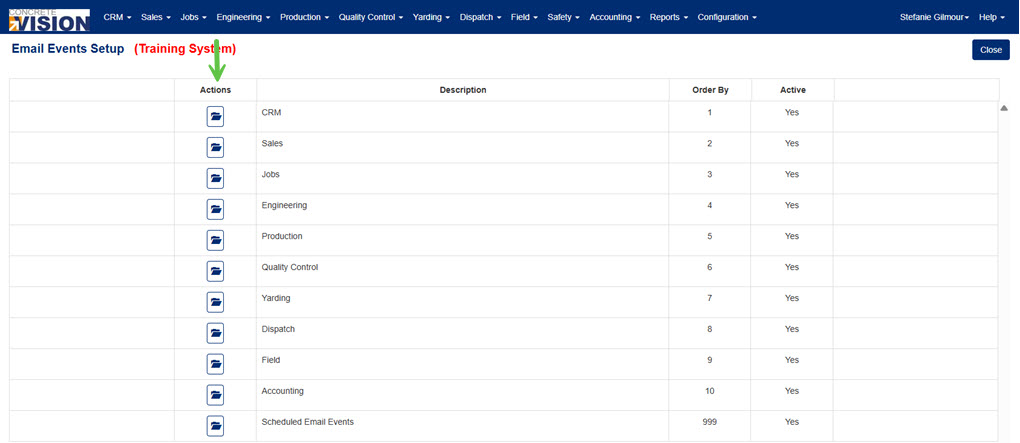
Figure 2
Selecting and Editing an Email Event
The second Email Events Setup screen will list module-specific events (Figure 3). Events are grouped under white headings on a blue background.
- Click the plus icon (green arrow in Figure 3) to display the Email Events in that area of CV.
- Click the Edit icon (green box in Figure 3) next to the Email Event to edit.
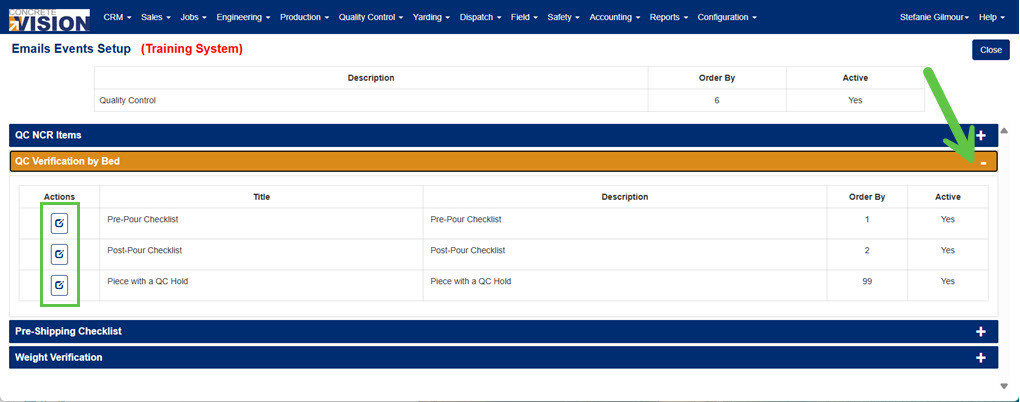
Figure 3
Activating the Email Event
On the right side of the Email Events Setup screen (Figure 4), the Active checkbox (yellow box in Figure 4) should be checked to make the Email Event active in Concrete Vision. If unchecked, no email will trigger when the event occurs.
Editing Email Events - General Tab
There are tabs (purple box in Figure 4) on the Email Events Setup screen. The General Tab controls options for the email's content. To edit the email content:
- Enter the email subject line in the Subject field.
- Enter the body in the Description text area.
- Click the Save button (red box in Figure 4) to save changes or the Save & Close button (green box in Figure 4) to save changes and return to the previous screen.
Replace Text Key
On the General Tab, at the right of the screen, is a Replace Text reference table (orange box in Figure 4). Use the Replace Text codes to pull in information from the Concrete Vision database to appear in the email content.
For example: In Figure 4, the Email Event is a "New Production NCR Created." If the Replace Text code $BedName$ is typed in the email content, the name of the bed related to the new NCR will be the text in the email's body when it is sent.
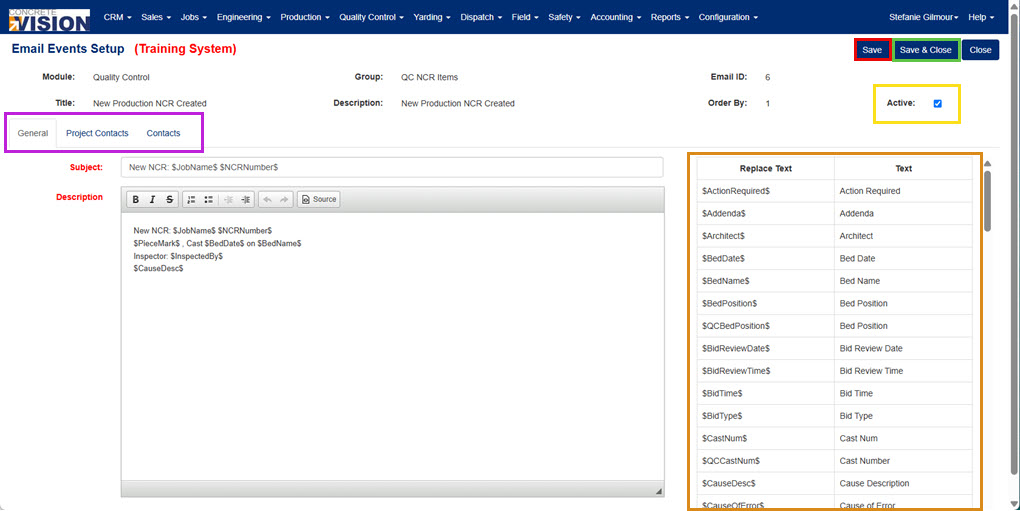
Figure 4
Editing Email Events - Project Contacts Tab
There are tabs (purple box in Figure 4) on the Email Events Setup screen. The Project Contacts Tab controls options for which project-specific contacts will receive the email. To edit which project contacts receive the email:
- Check the checkbox, under the plant heading, for the contact to receive the email.
- Click the Save button (red box in Figure 4) to save changes or the Save & Close button (green box in Figure 4) to save changes and return to the previous screen.
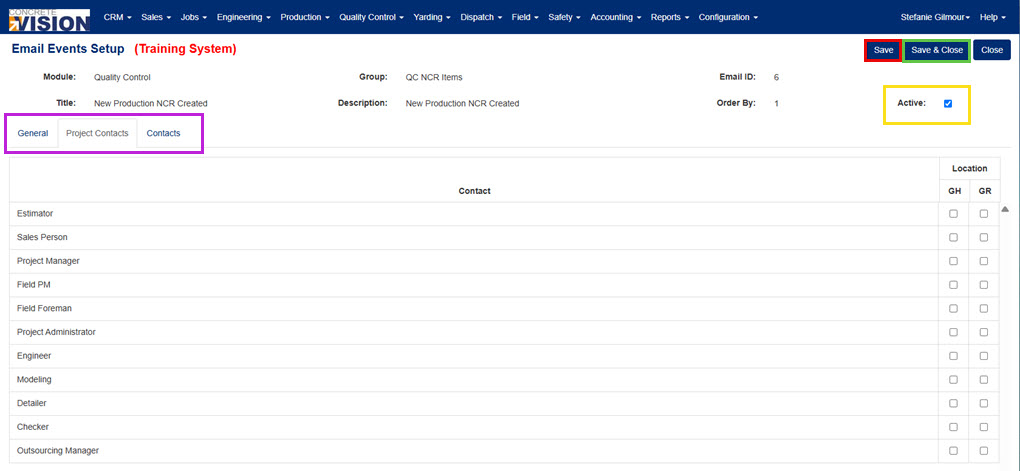
Figure 5
Editing Email Events - Contacts Tab
There are tabs (purple box in Figure 4) on the Email Events Setup screen. The Contacts Tab controls options for which contacts from the CV CRM will receive the email. To edit which CV contacts receive the email:
- Check the checkbox, under the plant heading, for the contact to receive the email.
- Click the Save button (red box in Figure 4) to save changes or the Save & Close button (green box in Figure 4) to save changes and return to the previous screen.
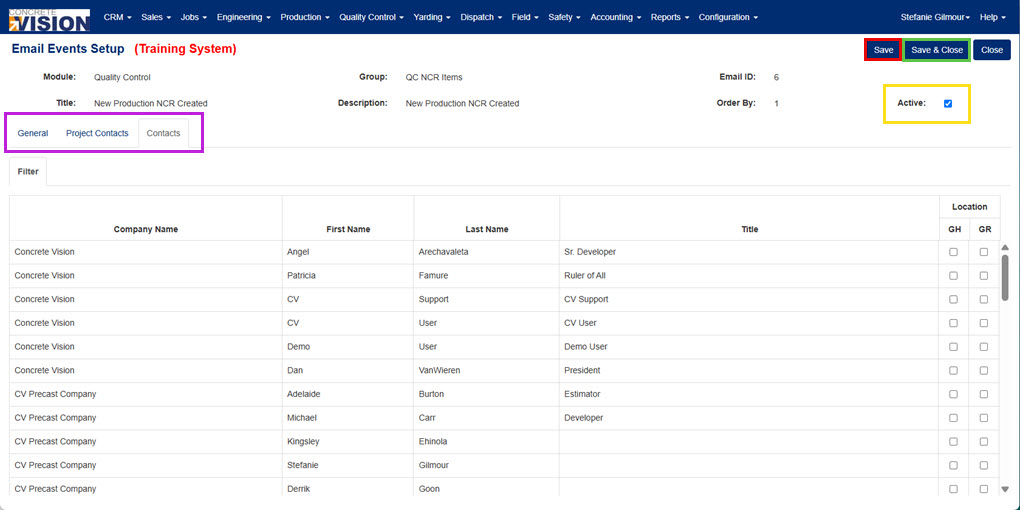
Figure 6
Filtering Contacts - Contacts Tab
A Filter Tab (yellow arrow in Figure 7) is located beneath the Contacts Tab (purple box in Figure 7). This filter can be used to quickly locate a contact.
- Click the Filter Tab (yellow arrow in Figure 7).
- Choose filter options from the fields and dropdowns.
- Click the Search button (green box in Figure 7).
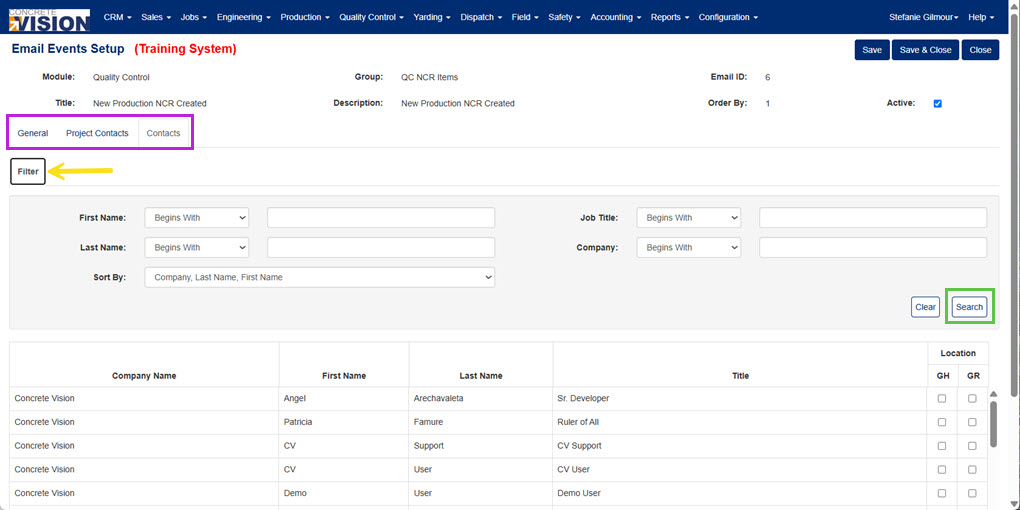
Figure 7
Was this article helpful?
That’s Great!
Thank you for your feedback
Sorry! We couldn't be helpful
Thank you for your feedback
Feedback sent
We appreciate your effort and will try to fix the article