Overview
The Piece Mark Import – TEKLA screen allows you to import piece marks and their corresponding BOM (Bill of Materials) using templates generated by Tekla. These imports go directly into Production, in contrast to Excel imports which must first be verified under Engineering > Piece Marks Not Verified before they can be moved to Production.
Accessing the Screen
Navigate to Engineering > Piece Mark / BOM Import – Tekla from the main menu.
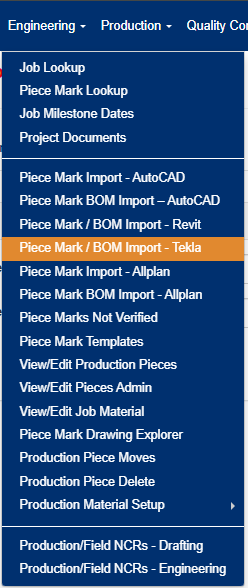
Figure 1
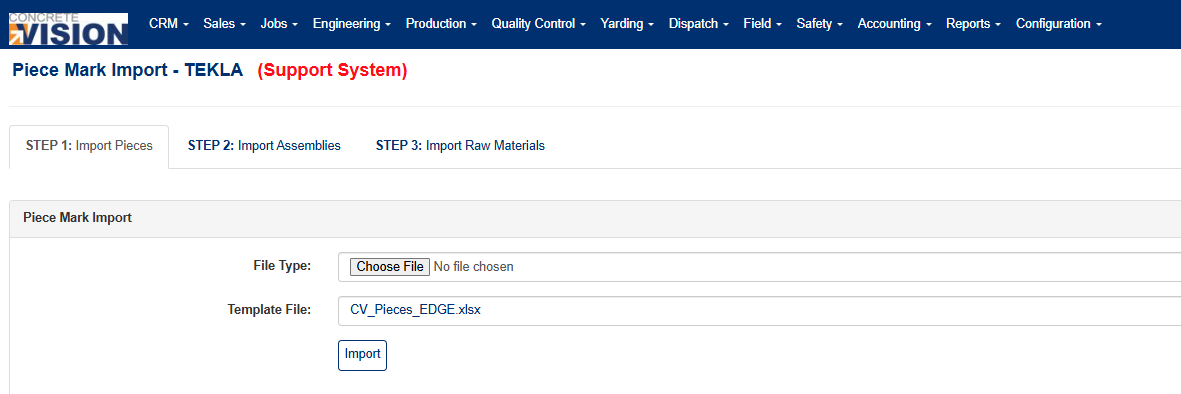
Figure 2
Import Order
Imports must be completed in the order specified by the tabs on the screen. Each step depends on the previous one being completed first:
- Step 1 – Import Pieces must be completed before Step 2.
- Step 2 – Import Assemblies must be completed before Step 3.
- Step 3 – Import Raw Materials
File Naming Requirements
Each import file name must begin with the job number followed by an underscore. For example, for job number 9999, acceptable file names would be:
- 9999_PieceMarks.xls
- 9999_Assemblies.xls
- 9999_RawMaterials.xls
How the Import Works
Each quantity for a piece mark occupies its own line in the import file. The PM_GUID is the unique identifier for each individual quantity, identifying the piece globally across the job.
The Tekla import functions as a sync between Tekla and Concrete Vision. This means all previously imported pieces must exist in the import file on any subsequent import.
- If a new PM_GUID is added, the import increases the quantity for that piece mark in Concrete Vision by 1.
- If an existing PM_GUID is removed, the import decreases the quantity for that piece mark in Concrete Vision by 1.
Note: Because the import acts as a sync, all previously imported PM_GUIDs must be present in every subsequent import file. Omitting a PM_GUID will reduce the piece mark quantity in Concrete Vision.
Was this article helpful?
That’s Great!
Thank you for your feedback
Sorry! We couldn't be helpful
Thank you for your feedback
Feedback sent
We appreciate your effort and will try to fix the article