Overview
Product Codes represent the second tier of product organization in Concrete Vision, sitting beneath Product Categories. At the product code level, two key configurations are defined:
- whether a piece mark within the product type is stockable (which impacts NCRs)
- whether weight verification is required (which affects the Assign Yard Location mobile feature)
Product Codes are then assigned to the Phases of a job.
Accessing the Screen
Navigate to Configuration > Product Codes from the main menu (Figure 1).
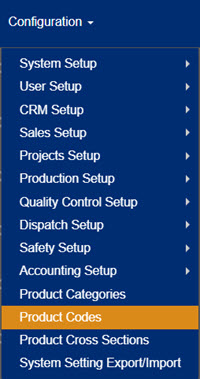
Figure 1
Using the Product Codes Screen
The Product Codes screen (Figure 2) offers the following functions:
- Add a new product code.
- Edit an existing product code.
- Delete a product code.
- Export the displayed codes list to Excel.
- Export the displayed codes list as a PDF.
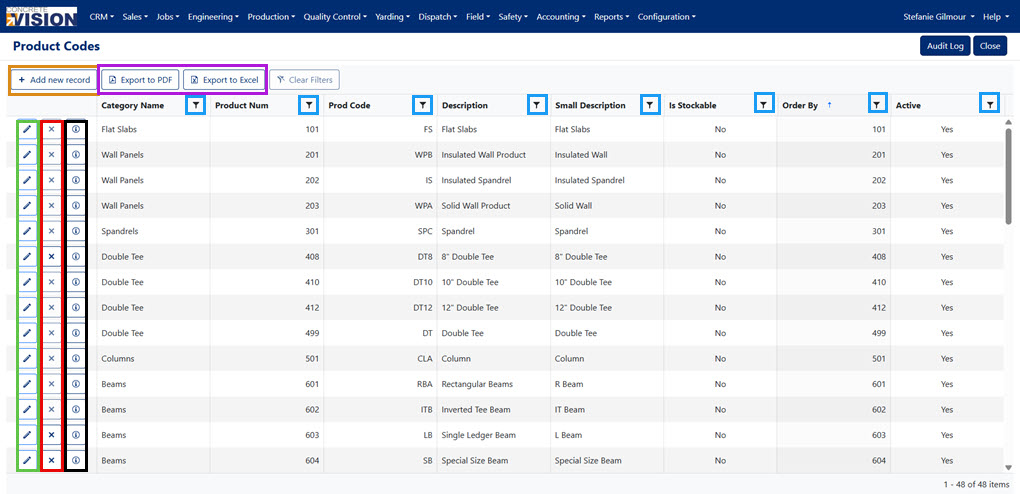
Figure 2
| Column | Description |
|---|---|
| Category Name | Name of the category the product code belongs to. |
| Product Num | The product number associated with this product code. |
| Prod Code | The product code. |
| Description | Large description of product code for reports with longer character count. |
| Small Description | Brief description of product code for reports with shorter character count. |
| Is Stockable | Are products within this product code stockable? |
| Order By | Order the product code appears in a list of types. |
| Active | Is the product code active in Concrete Vision? |
NOTE: If a product code is marked as stockable, NCRs will offer a Scrap to Stock option.
Sorting and Filtering the Product Codes Screen
To filter data by specific criteria:
- Locate the filter icon - Look for the small funnel icon to the right of any column heading (Blue box, Figure 2)
- Click the filter icon - A dropdown menu will appear with the available filtering options. Keep in mind that the filter conditions vary depending on the column selected.
- Select criteria - Choose from available values or enter custom search terms (Red box, Figure 3)
- Apply the filter - The table will automatically update to show only matching results
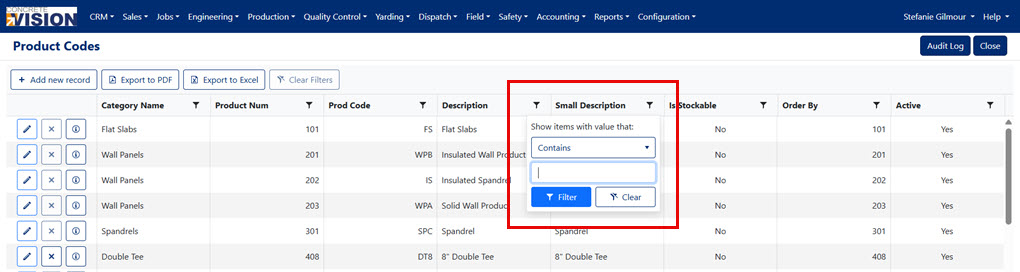
Figure 3
Adding a New Product Code
On the Product Codes screen (Figure 2):
- Click the Add New Record button (Orange box, Figure 2) in the top left of the screen.
- In the Add New popup window (Figure 4), complete the fields, dropdown selections, and checkbox options.
- Select the Category Name for the new Product Code. (Required)
- Enter the Product Code for the new Product Code. (Required, Unique. Max length 10)
- Enter the Small Description for the new Product Code. (Required, Unique. Max length 50)
- Enter the Description for the new Product Code. (Required, Unique. Max length 100)
- Enter a Design Mark Prefix (Optional. Max length 50)
- Enter a Prd Code for Phases (Optional, Unique. Max length 50)
- Enter any/all other needed product dimensions and specifications.
- Set the new Product Code as Active or Inactive.
- Click the Save button (Green box, Figure 4).
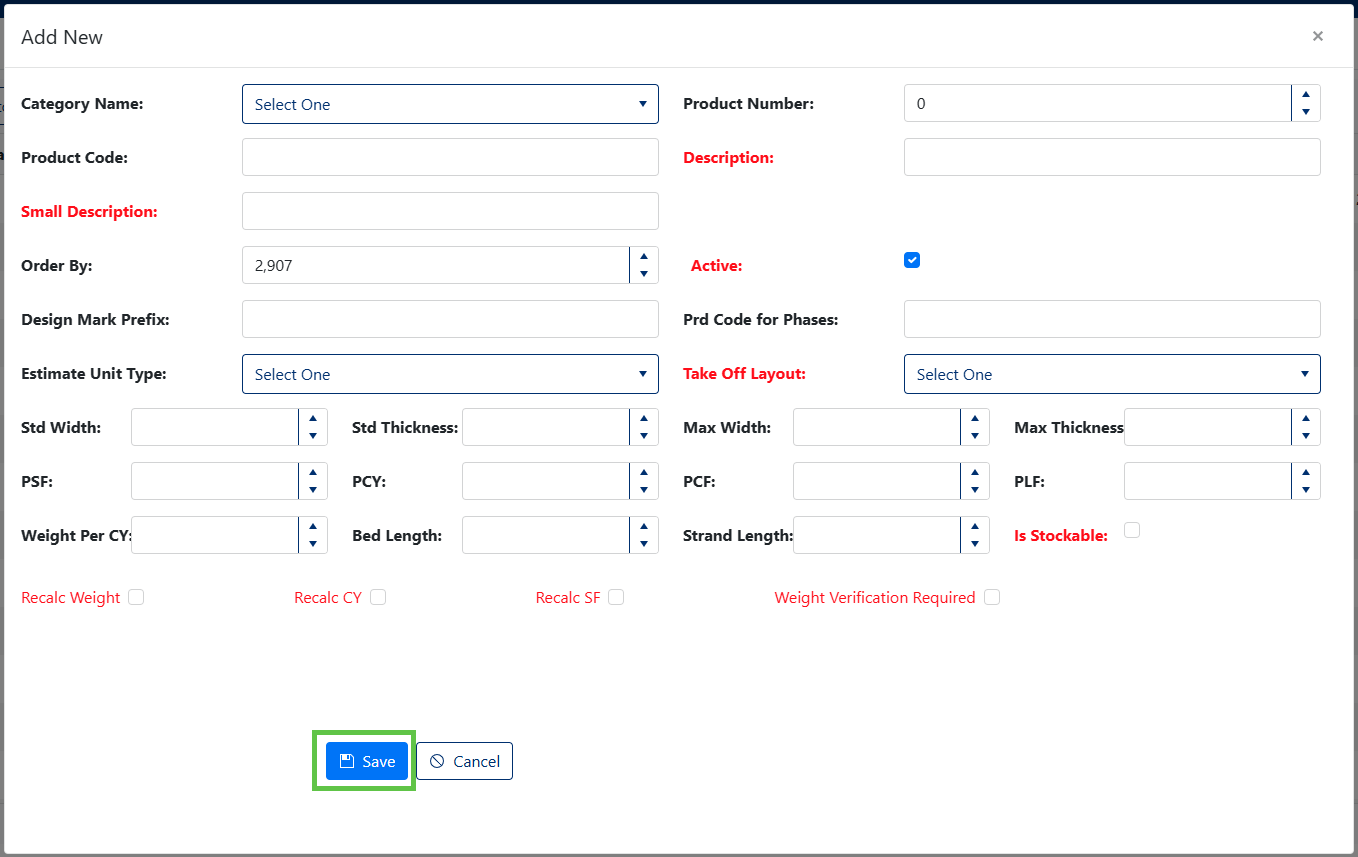 Figure 4
Editing a Product Code
On the Product Codes screen (Figure 2):
- Click the Edit icon (Green box, Figure 2) next to the product code to edit.
- In the Edit Item popup window, revise code settings as needed.
- Click the Save button (Red box, Figure 5)
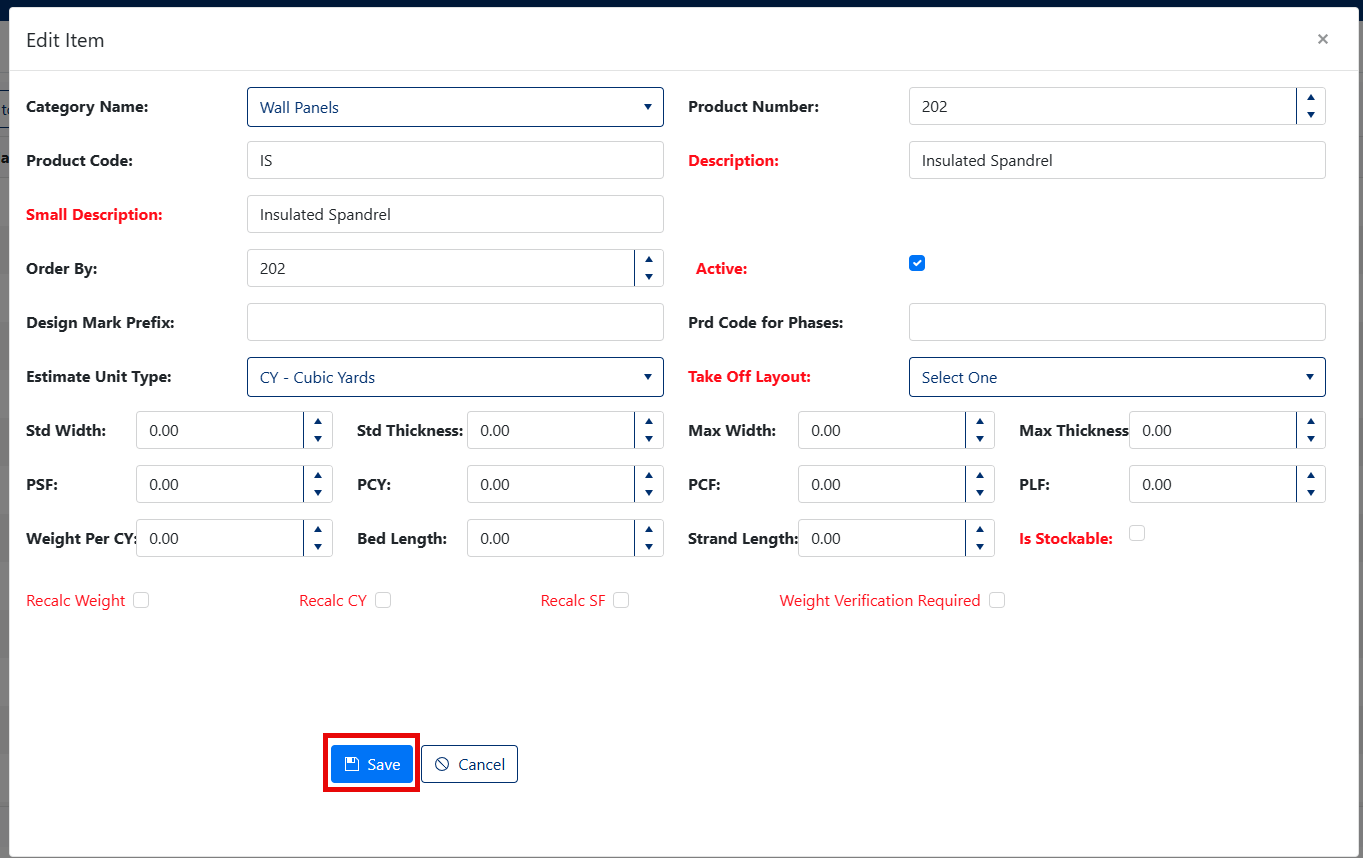
Figure 5
Deleting a Product Code
On the Product Codes screen (Figure 2):
- Click the X icon (Red box, Figure 2) next to the product code to delete.
- In the confirmation popup (Figure 6), click the Ok button.
Note: Product codes in use cannot be deleted. Instead of deleting a product code, it is recommended the code be set to Inactive by unchecking the Active checkbox.
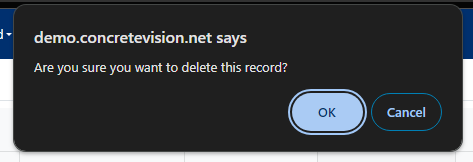
Figure 6
Audit Information
Tracking Changes
Click the info icon (i) next to any Product Type to view: (Black box, Figure 2)
- Who created the record and when (Figure 7)
- Who last modified the record and when
- Complete change history for accountability
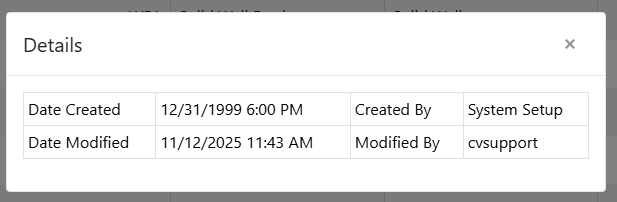
Figure 7
Export Product Type List to Excel
On the Product Type screen (Figure 2):
- Sort the Type list using the headings in the table (Blue box, Figure 2).
- Click the Export for PDF button (Purple box, Figure 2).
Export Product Type List as a PDF
On the Product Type screen (Figure 2):
- Sort the Type list using the headings in the table (Blue box, Figure 2).
- Click the Export for Excel button (Purple box, Figure 2).
Was this article helpful?
That’s Great!
Thank you for your feedback
Sorry! We couldn't be helpful
Thank you for your feedback
Feedback sent
We appreciate your effort and will try to fix the article