Overview
This article outlines how to configure the Pre-Shipping Checklist in Concrete Vision using the checklist setup in the Configuration module. The Pre-Shipping Checklist ensures that pieces meet quality and readiness requirements before they are released for shipment, helping prevent non-conforming or incomplete product from leaving the yard.
Accessing the Screen
Navigate to Configuration > Quality Control Setup > Pre-Shipping Checklist from the main menu (Figure 1).
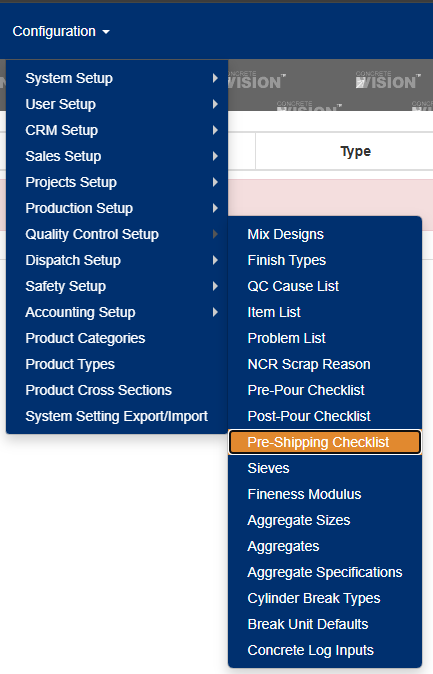
Figure 1
Using the Pre-Shipping Checklist Screen
The Pre-Shipping Checklist screen (Figure 2) is where checklist categories and checklist items can be viewed, added, edited, and deleted. Click the + icon at the far right of a category name to expand a category and view the checklist items within that category.

Figure 2
Adding a New Pre-Shipping Category
- Click the Add New button. This opens the Pre-Shipping Category Add/Edit screen (Figure 3).
- Enter a checklist category name.
- Enter an order by.
- Click the Save button to save and view the information, or click the Save & Close button to save this information and go back to the Pre-Shipping Checklist screen (Green box, Figure 3).

Figure 3
Editing a Pre-Shipping Category
- Click the + icon (Yellow box, Figure 2) to expand the checklist category.
- In the first column, click the Edit icon (Red box, Figure 4).
- Modify the checklist category name as needed.
- Modify the order by as needed.
- Activate or deactivate the category as needed.
- Click the Save button to save and view the information, or click the Save & Close button to save this information and go back to the Pre-Shipping Checklist screen (Green box, Figure 3).
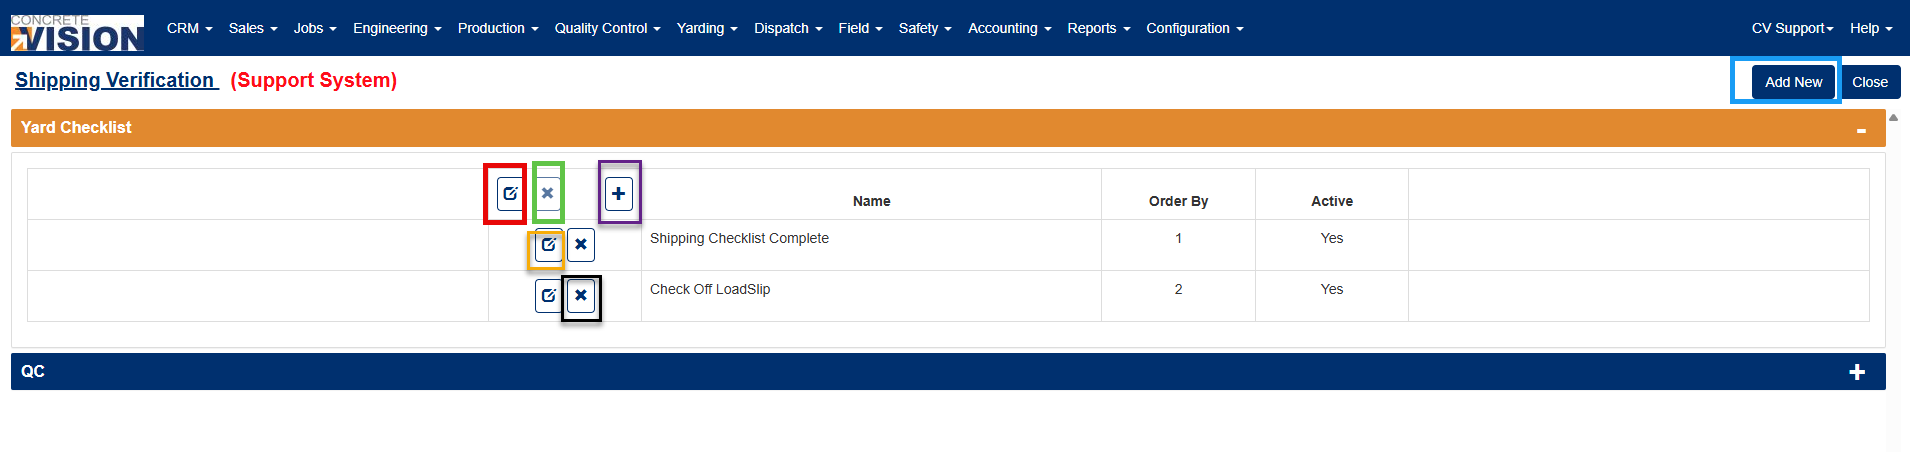
Figure 4
Deleting a Pre-Shipping Category
- Click the + icon (Yellow box, Figure 2) to expand the category.
- In the first column, click the X icon (Green box, Figure 4).
- A popup will ask if the category record should be deleted. Click the Ok button (Figure 5).
Note: Only a category that does not have checklist items assigned to it can be deleted. If the category has checklist items assigned to it, the delete button will be disabled.
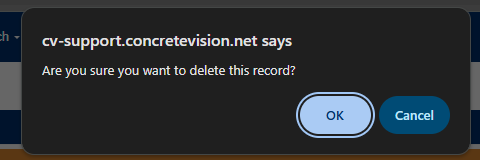
Figure 5
Adding a New Pre-Shipping Item
- Click the + button of the Product Category (Purple box, Figure 4). The Pre-Shipping Item Add/Edit screen (Figure 6) will open.
- Enter a checklist item name.
- Enter an order by.
- In the Product Categories tab, select the products the checklist item applies to (Green box, Figure 6). Clicking the check box in the column head (Green arrow, Figure 6) will select all products.
- Click the Plants tab (Yellow box, Figure 6) and select which plants the checklist item applies to.
- Click the Tolerance tab (Yellow box, Figure 6) to enter tolerance details (not required).
- Click the Save button to save and view the information, or click the Save & Close button to save this information and go back to the Pre-Shipping Checklist screen (Red box, Figure 6).
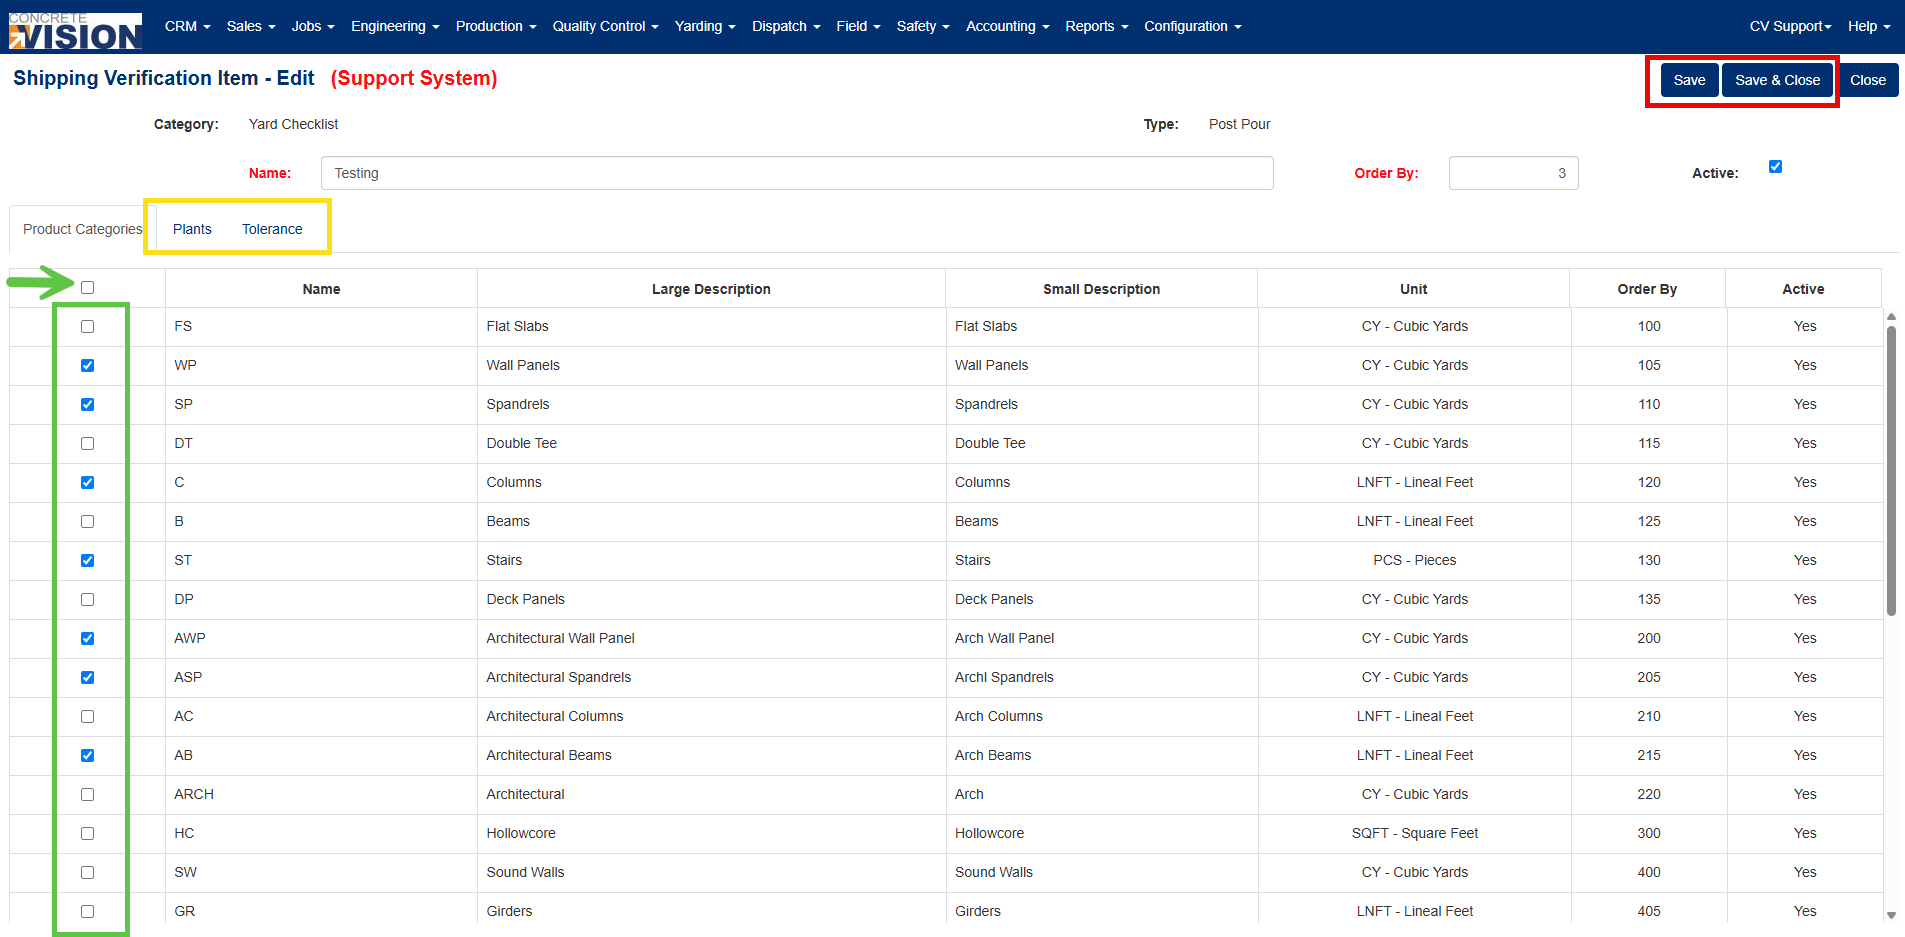
Figure 6
Editing a Pre-Shipping Item
- Click the Edit icon (Orange box, Figure 4) next to the checklist item to edit. The Pre-Shipping Item Add/Edit screen (Figure 6) will open.
- Modify the checklist item name if needed.
- Modify the order by if needed.
- Activate or deactivate the item as needed.
- Modify the selected plants if needed.
- Modify the tolerance if needed (not required).
- Modify the products the checklist item applies to. Clicking the check box in the column head (Green arrow, Figure 6) will select all products.
Deleting a Pre-Shipping Item
- Click the Delete icon next to the checklist item (Black box, Figure 4).
- A popup will ask if the item record should be deleted. Click the Ok button (Figure 7).
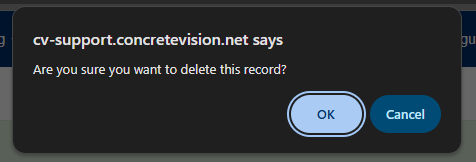
Figure 7
Was this article helpful?
That’s Great!
Thank you for your feedback
Sorry! We couldn't be helpful
Thank you for your feedback
Feedback sent
We appreciate your effort and will try to fix the article