Overview
The Material Items screen is used to create, edit, and manage the raw materials used in production — such as rebar, embeds, and other components referenced by piece marks and bill of materials (BOM) entries. Each material item is assigned to a Category, linked to a GL Code for accounting, and configured with unit of measure, cost, weight, and waste factor information used throughout production and purchasing.
This screen also supports bulk import and export of material items via Excel, making it easy to set up or update large numbers of items at once.
Production material items are considered standard material items. Because they are not job-specific, reports can be run to see how production material items are being utilized across Concrete Vision. Production material items are used "as-is" and are not combined with other materials to make a new item.
Note: Material items that are referenced by an assembly (as a parent or sub-item) or flagged as an internal record cannot be deleted from this screen. The Delete action will be disabled for these items.
Accessing the Screen
Navigate to Accounting > Production Material Setup > Material Items.
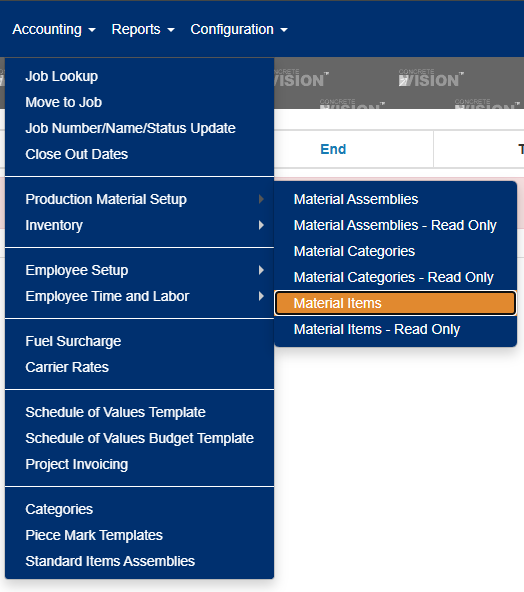
Figure 1
The list screen includes the following action buttons:
- Report — Opens a printable report of material items in a new tab.
- Export — Exports the current filtered list of material items to Excel.
- Filter — Expands or collapses the search/filter panel.
- Add New — Opens a blank Material Item record for entry.
- Close — Returns to the main menu.
Using the Standard Material Items Screen
The Material Items screen (Figure 2) performs the following functions:
- Search and Sort the material items list using filters.
- Add a standard material item.
- Edit a standard material item.
- Delete a standard material item.
- Export a filtered list of standard material items to Excel.
- Import standard material items.
Sorting the Standard Material Items Screen
The Material Items screen lists standard material items in a sortable, filterable table.
- Sort - Click any column header to sort by that field. After sorting, a blue arrow will indicate whether the sort is in ascending or descending order (Black box, Figure 2).
- Filter - Click the filter icon next to column headers to narrow results (Yellow box, Figure 2).
- Search - Click the filter icon (yellow box, Figure 2) and use the search functionality to find specific assemblies (Figure 3).
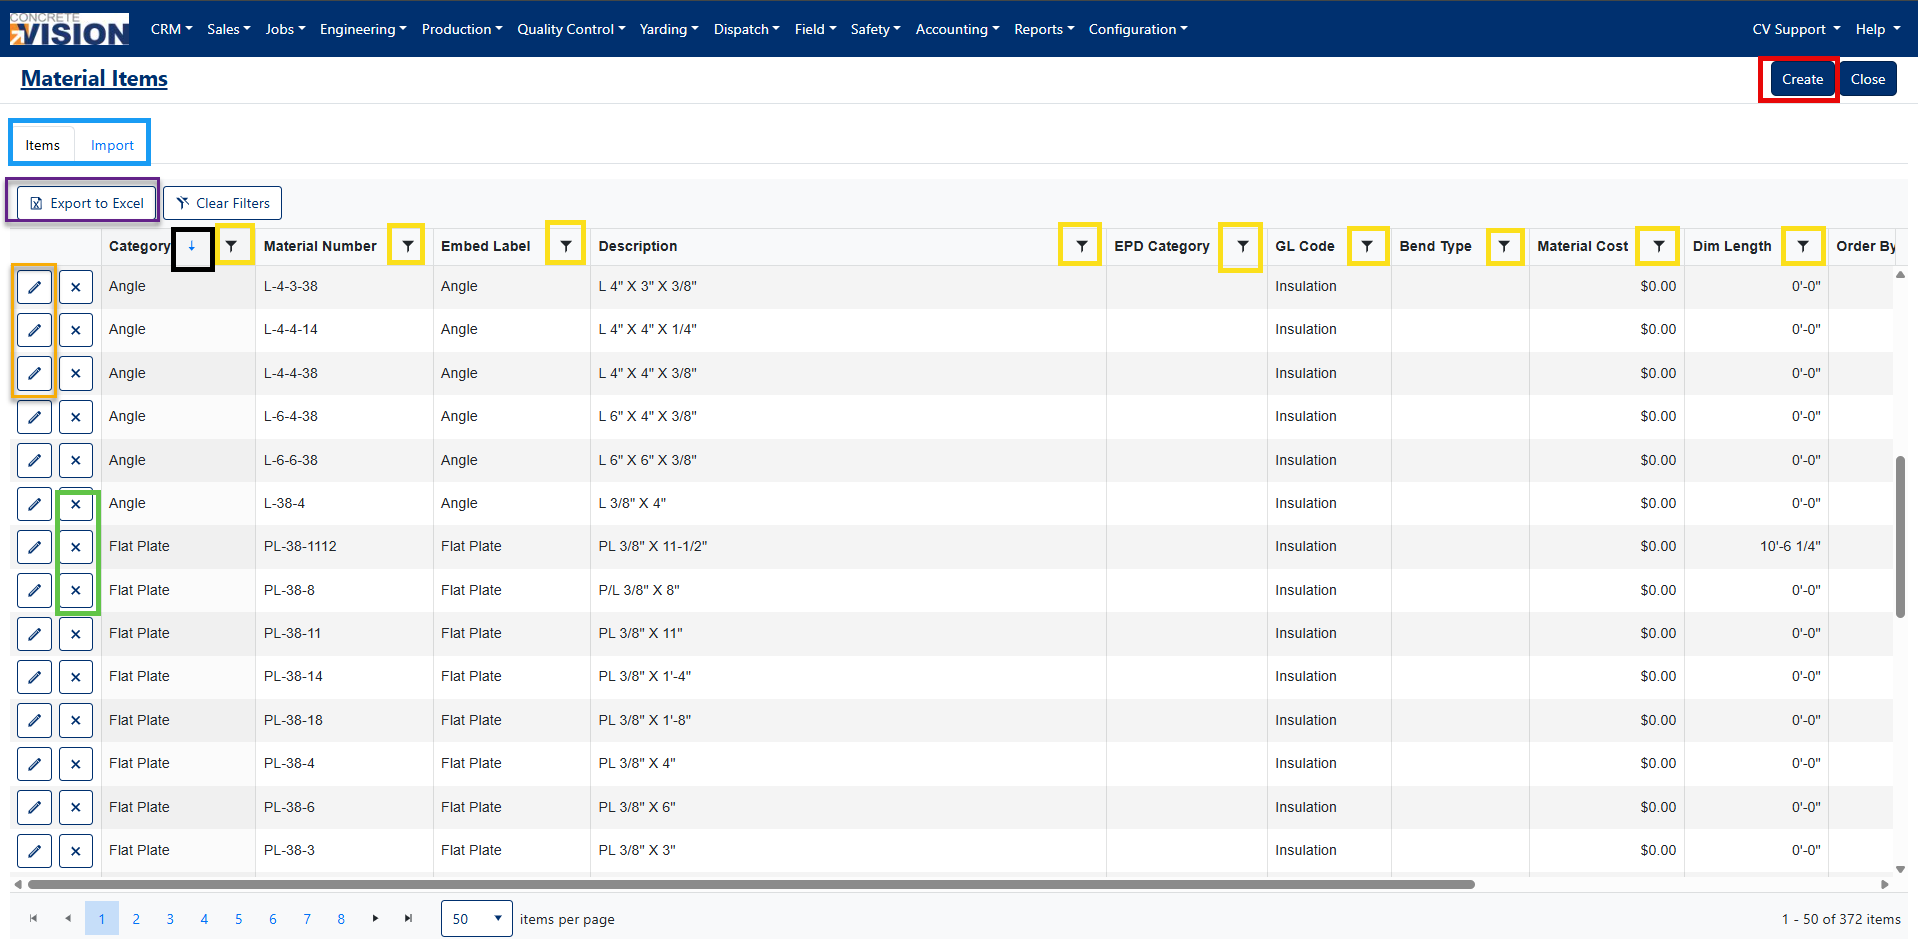
Figure 2
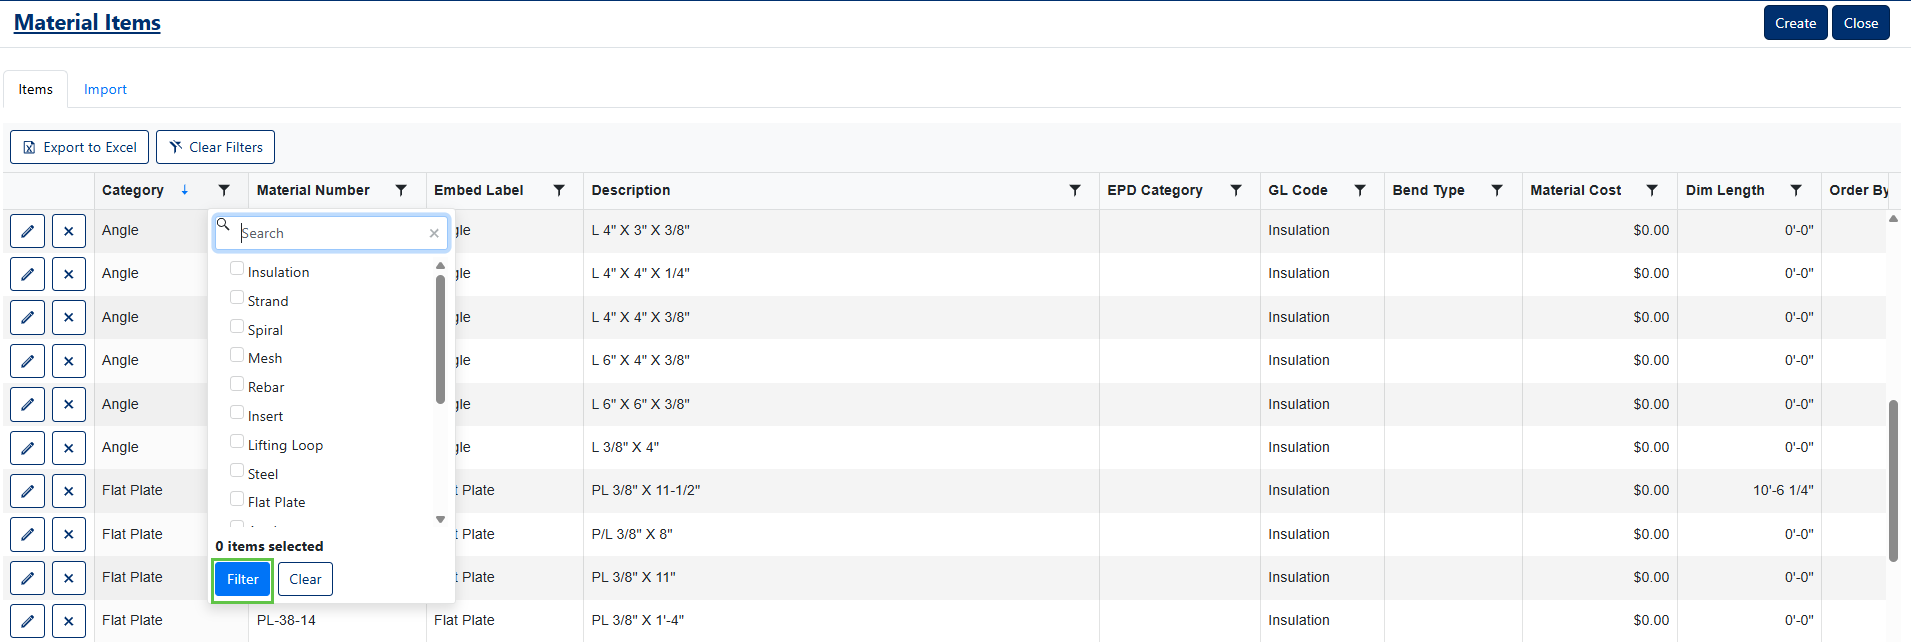
Figure 3
Adding a New Material Item
- Click Create button (Red box, Figure 2).
- Complete the material item fields, including Category, Material ID, Description, GL Code, unit of measure, cost, weight, and waste factor.
- Click Save or Save & Close to save the new record (Red box, Figure 4).
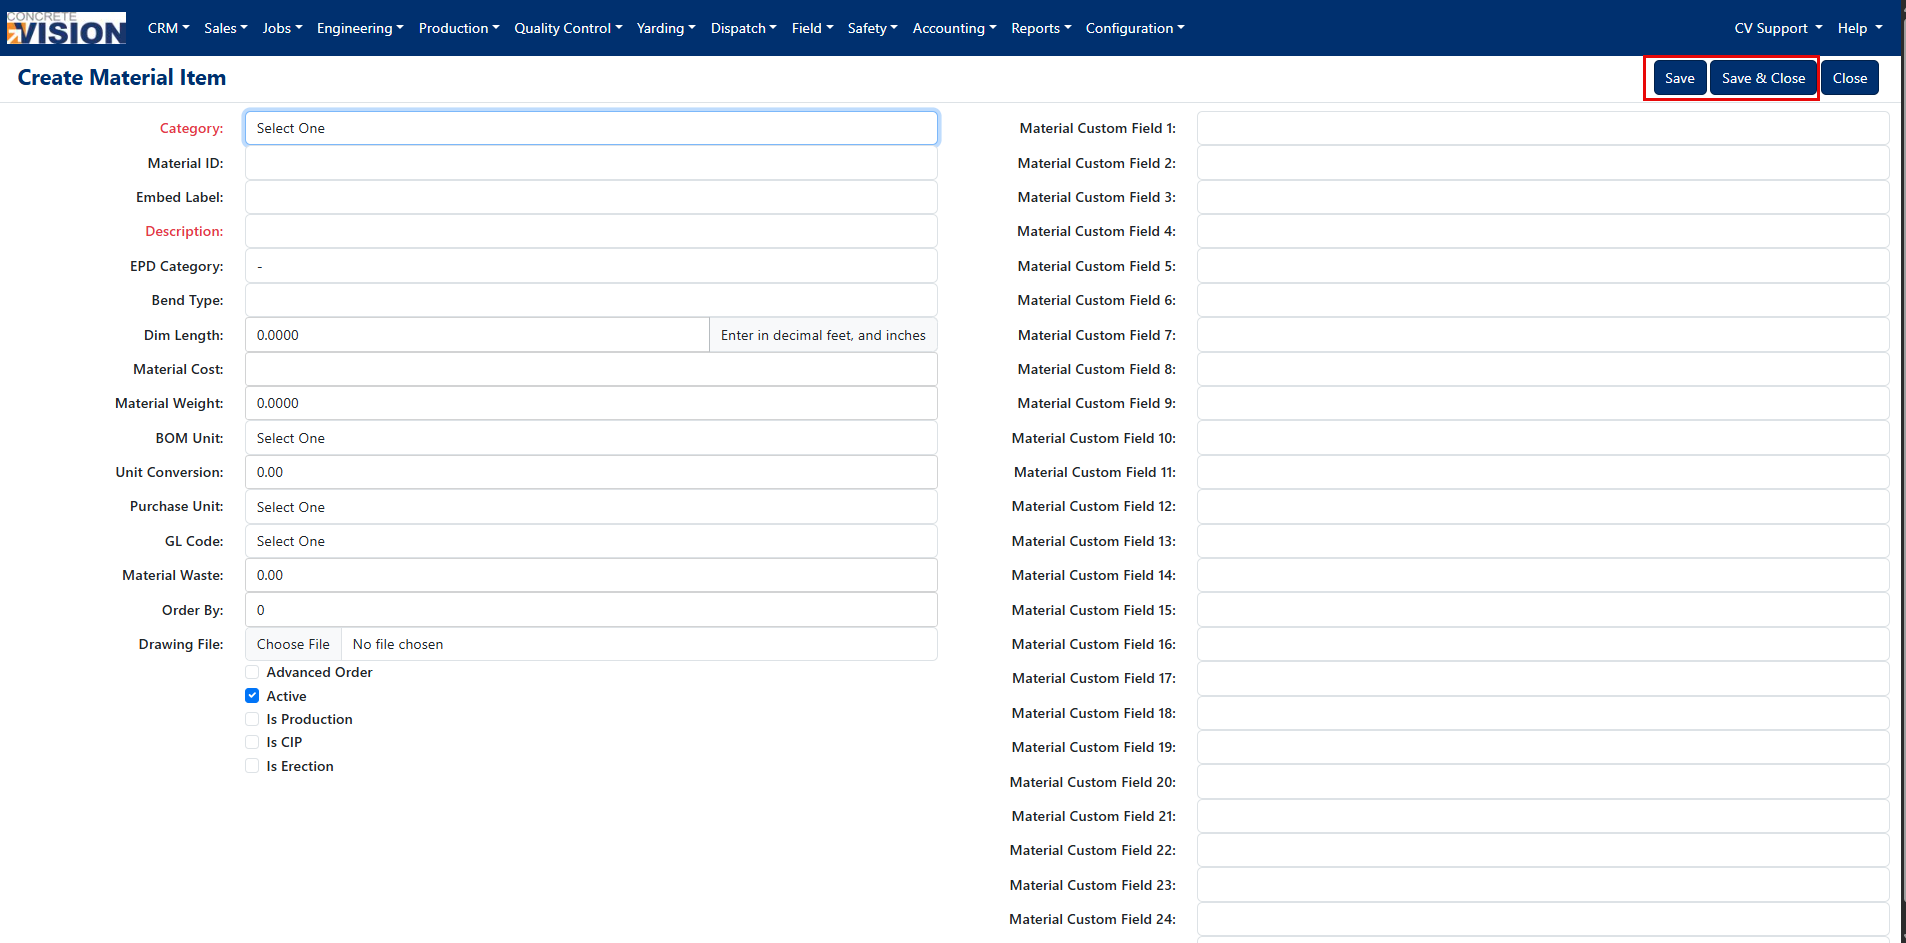
Figure 4
| Field Label | Description |
|---|---|
| Category (required) | The material category this material item belongs to. |
| Material ID | Value that uniquely identifies this material item. In the production material imports, the material ID is used to map an imported material item to this standard material. |
| Embed Label | Material embed value. |
| Description (required) | Description of the material item. In the edge import, this value is used to try and map imported material to standard material IF no match is found using the "Material ID" field. |
| EPD Category | Category for Environmental Product Declaration |
| Bend Type | Material bend type (if applicable). |
| Dim Length | Dimension length. |
| Material Cost | Dollar cost of the material. |
| Material Weight | Total material weight. |
| BOM Unit | Material unit code (i.e. SQFT, Each, LNFT, etc.) |
| Unit Conversion | How many BOM units of an item are in a purchased unit. For example: If a box of 100 nails had a BOM of "each," the unit conversion would be 100. |
| Purchase Unit | Unit the material item is purchased as. |
| GL Code | Accounting general ledger classification. |
| Material Waste | Material waste factor. |
| Order By | Value specifying material item's display order in material reports and list screens. |
| Drawing File | Material drawing file. |
| Advanced Order | Specifies whether this material item has a long lead time for purchase and delivery. |
| Active | Sets active status of the material item. In-active material items won't show in lists used to assign standard material to production. |
| Is Production | Specifies whether this material item shows up under the job material "Production" tab. |
| Is CIP | Specifies whether this material item shows up under the job material "CIP" tab. |
| Is Erection | Specifies whether this material item shows up under the job material "Erection" tab. |
| Material Custom Field(s) 1-25 | Fields used for custom (customer specific) values. Fields can only be altered through custom programing per customer. |
Editing a Material Item
- Locate the item in the list and click the Edit icon (Orange box, Figure 2).
- Update the necessary fields.
- Click Save or Save & Close to save the new record (Yellow box, Figure 5)
- To update all material assemblies, click the Update Assemblies button.
- In the confirmation popup, click OK (Figure 6).
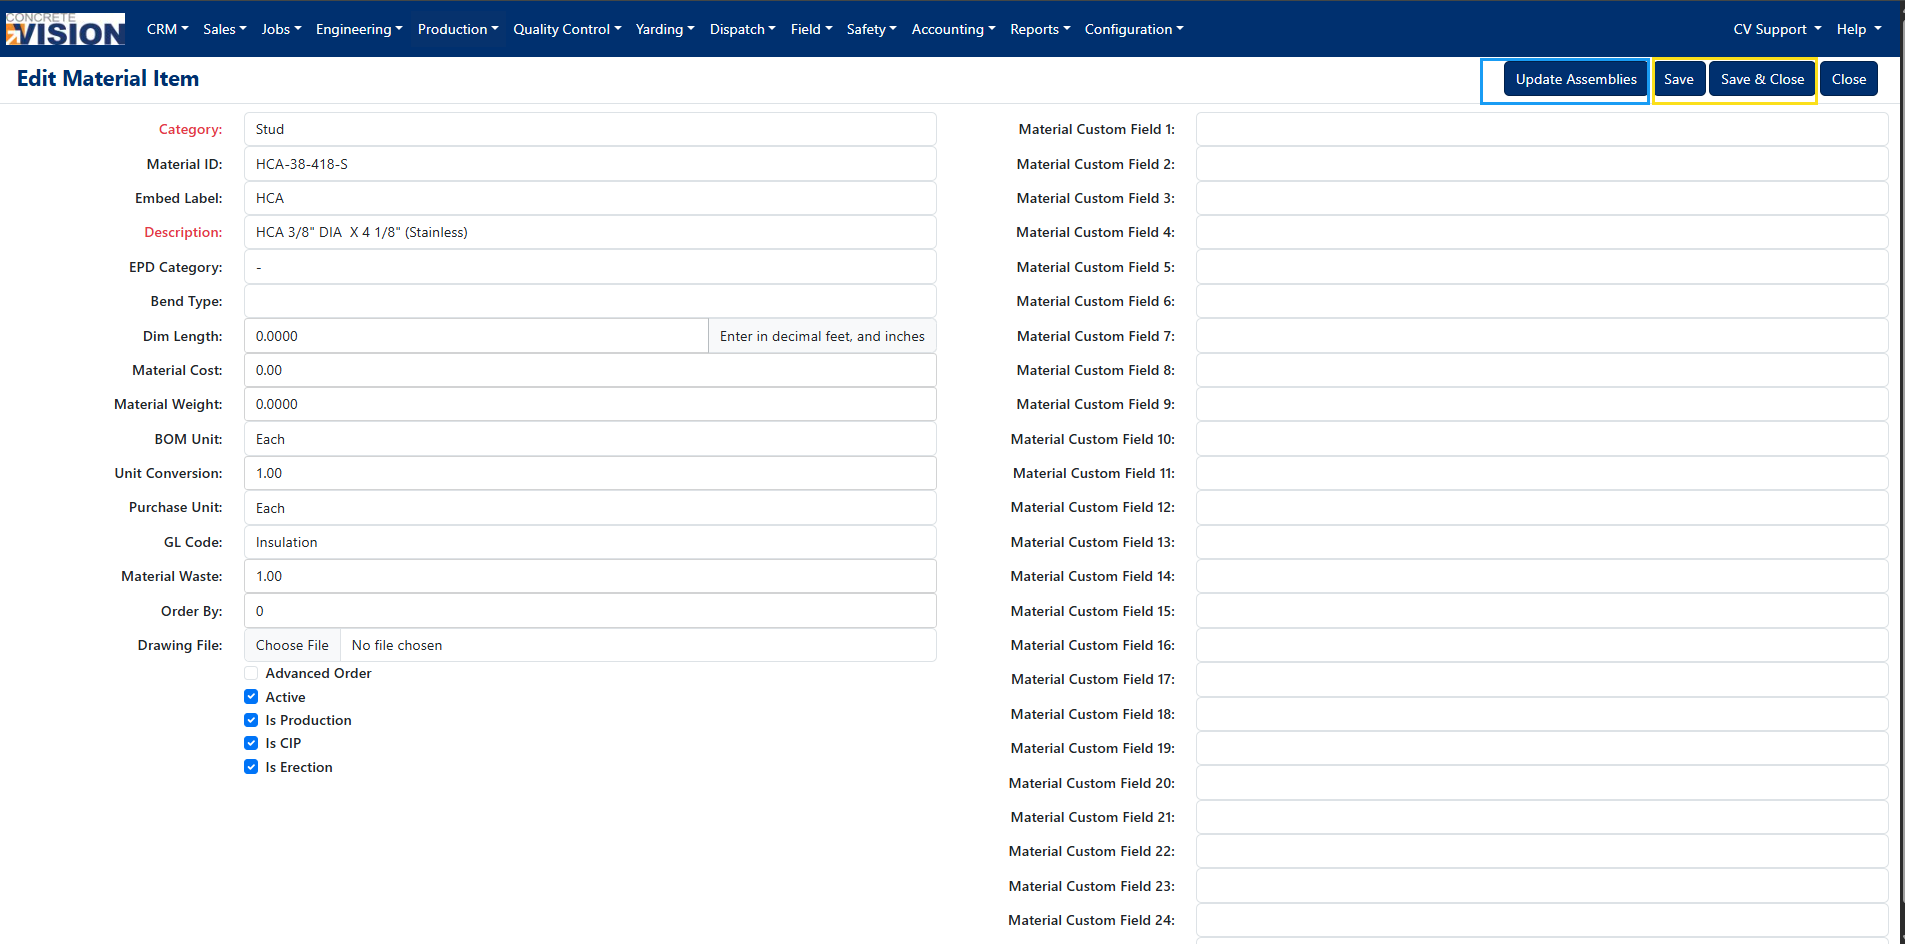
Figure 5
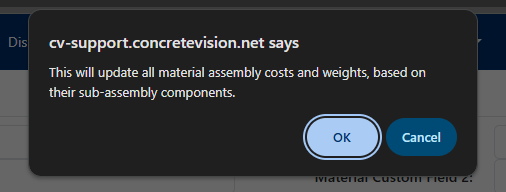
Figure 6
Deleting a Material Item
- Locate the item in the list and click the Delete icon (Green box, Figure 2).
- In the confirmation popup, click OK (Figure 7).
Note: The Delete icon will be disabled and unavailable if the material item is used as part of an assembly (either as a parent item or a sub-item), or if it is flagged as an internal system record. In these cases, the item cannot be removed until those associations are cleared.
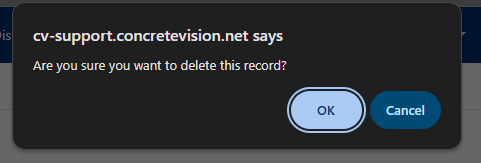
Figure 7
Exporting a List of Standard Material Items to Excel
From the Material Items screen (Figure 2):
- Use the column headings to filter the list as needed.
- Click the Export to Excel button (Purple box, Figure 2). The .csv file will download.
Import Standard Material Items
From the Material Items screen (Figure 2):
- Click the Import tab (Blue box, Figure 2). The Materials Items - Import screen (Figure 8) will appear.
- Click the "Excel Template Download" link (Yellow arrow, Figure 8) to download the Material Items Excel template.
- Complete the Data tab of the spreadsheet template. Directions for how to fill out the spreadsheet template is noted on its Instructions tab. Required columns are marked with a red header.
- Click the Choose File button (Blue box, Figure 8) to select the completed spreadsheet.
- Click the Upload button (Red box, Figure 8) to upload the completed spreadsheet.
- The Material Items - Import screen will refresh with a table row to verify the imported data (Figure 9). Click on the Edit icon (Red arrow, Figure 8) to review the imported data.
- The Material Items - Import screen will refresh with rows of data for the individual imported standard material items. Review the imported item details. Click the Edit icon on individual items if corrections are needed (Green box, Figure 9).
- Click the Verify button (Red box, Figure9) when all data is correct.
- The Material Items - Import screen will refresh to the previous screen (Figure 8). From this screen, click the Move icon (Yellow box, Figure 8) to move the imported standard material items into CV.
Note: When importing, leave the CV ID column blank to create a new material item. If you enter an existing CV ID, that record will be updated instead.
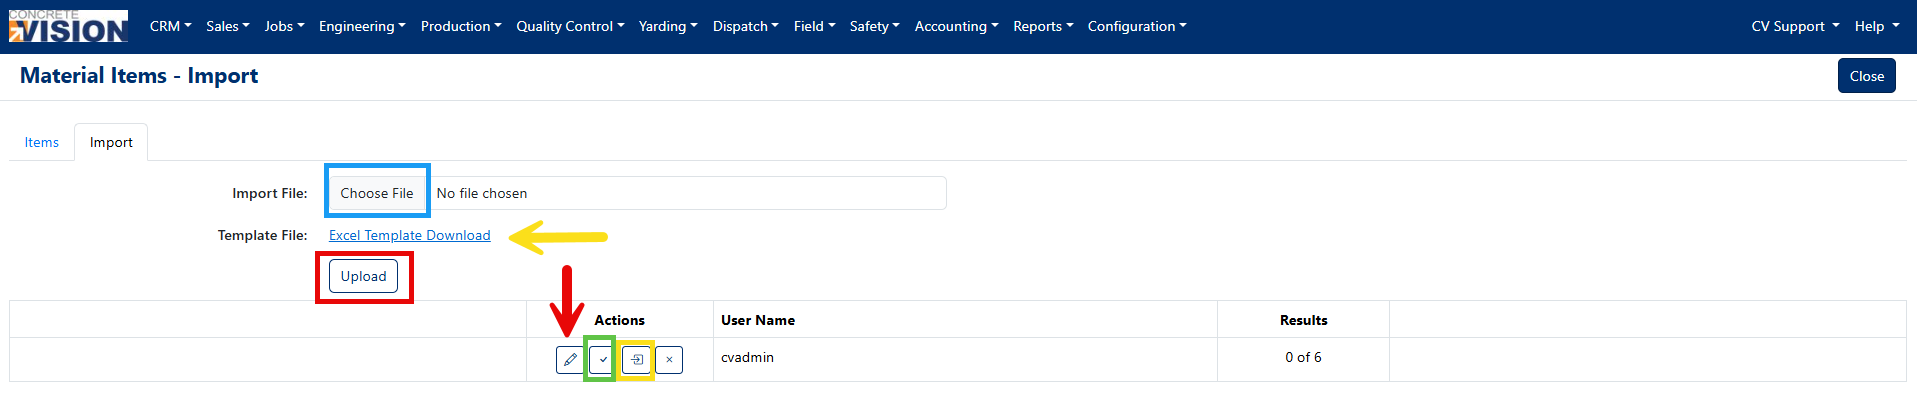
Figure 8
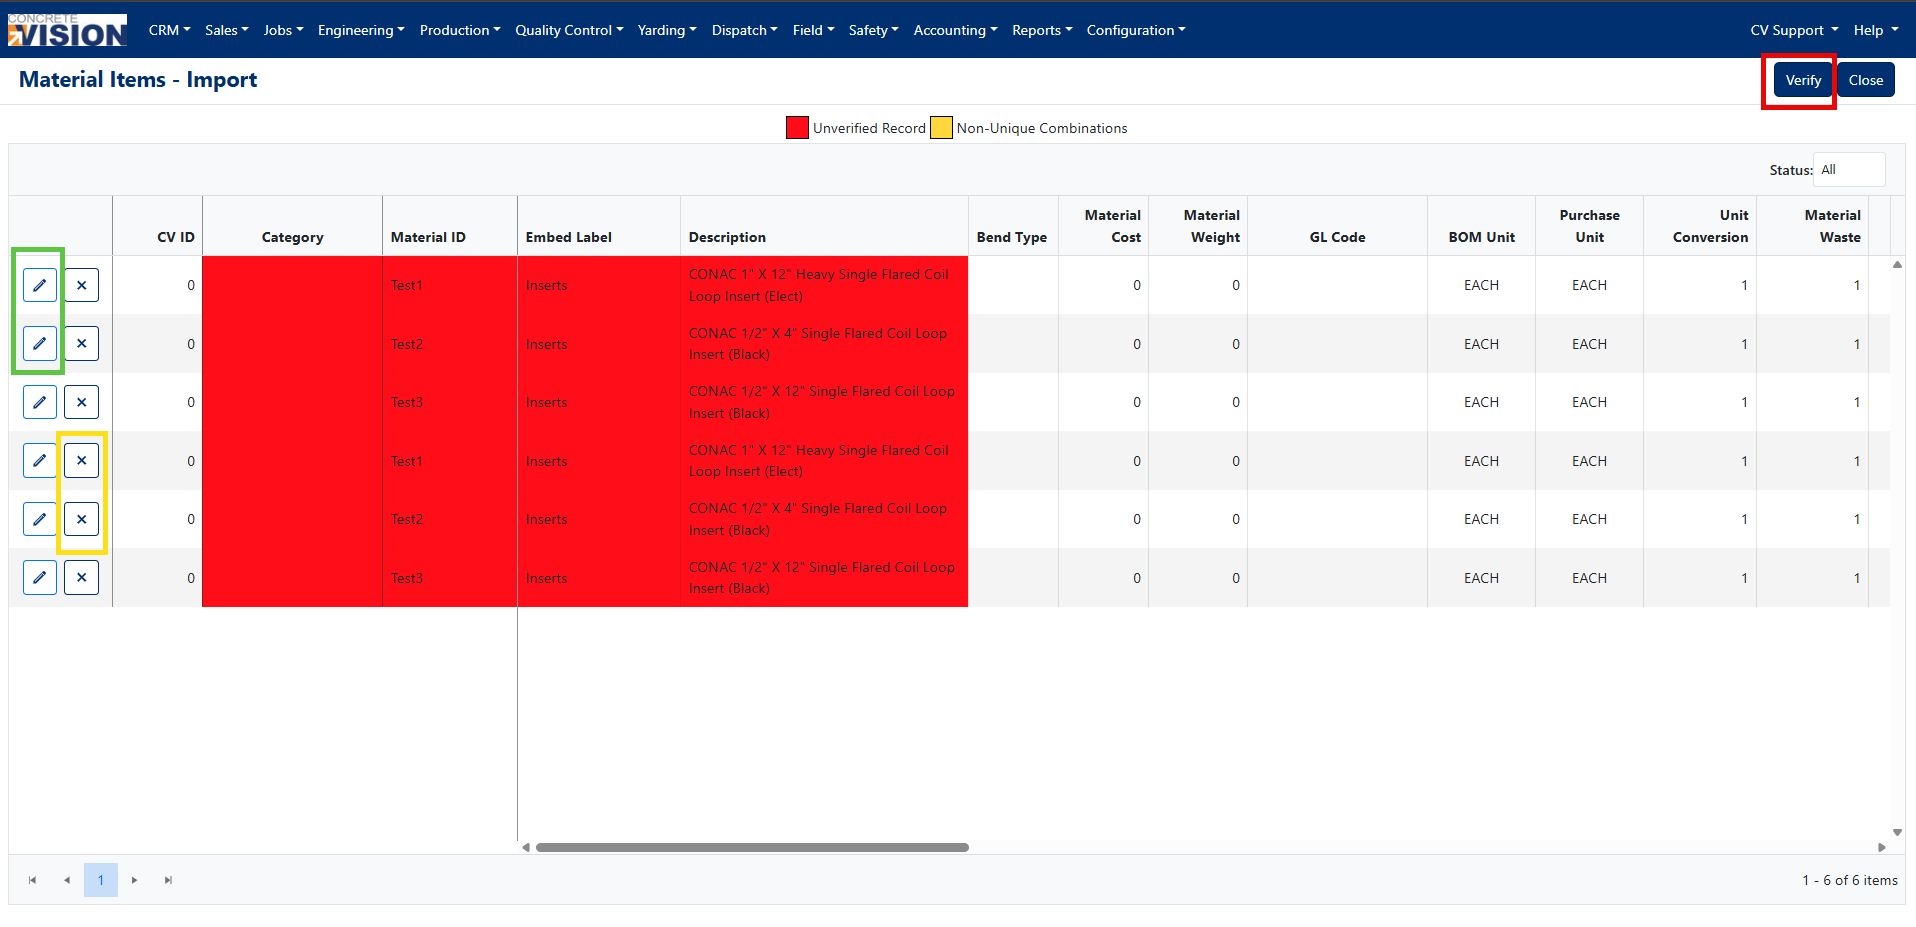
Figure 9
Was this article helpful?
That’s Great!
Thank you for your feedback
Sorry! We couldn't be helpful
Thank you for your feedback
Feedback sent
We appreciate your effort and will try to fix the article