Overview
From the Field Reports screen, a field report can be added, edited, or deleted. Attachments can be added to the field reports, and individual field reports can be generated as pdfs. The Field Reports screen table can be exported to Excel or generated as a pdf.
Accessing the Field Reports Screen
Navigate to Field > Field Reports from the main menu (Figure 1)..
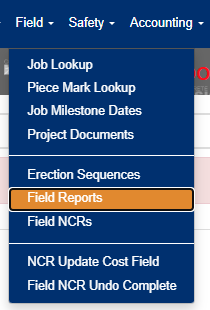
Figure 1
Using the Field Reports Screen
From the Field Reports screen (Figure 2):
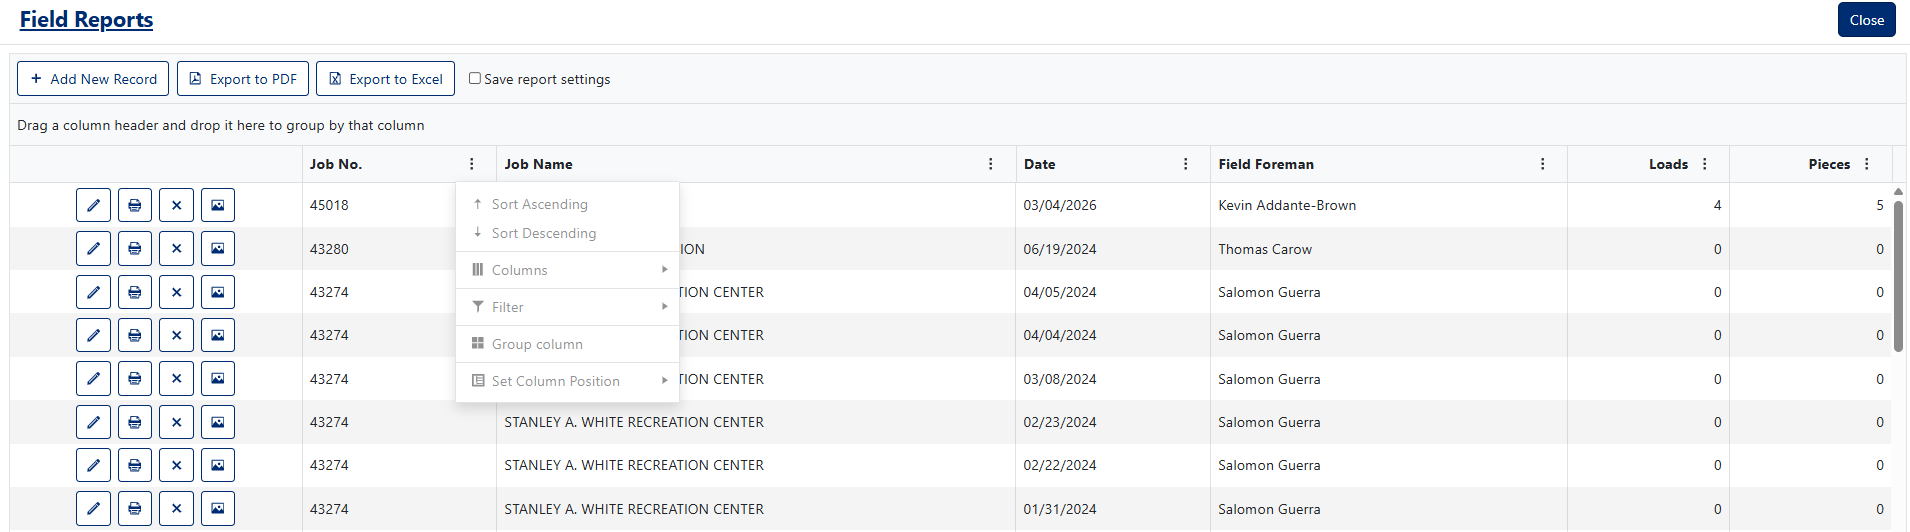
Figure 2
Adding a New Field Report
From the Field Reports screen (Figure 2):
- Click on the Add New Record button (Green arrow, Figure 2). An Add New window (Figure 3) will pop up.
- Select Job.
- Select the Field Foreman.
- Enter a date.
- Click the Add button (red box, Figure 3). The Field Report - Edit screen will appear (Figure 4).
- Fill in applicable information for the new field report.
- Click the Save button to save the report or the Save & Close button to save the report and return to the previous screen (Red box, Figure 4).
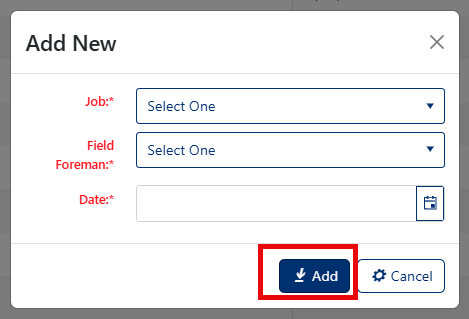
Figure 3
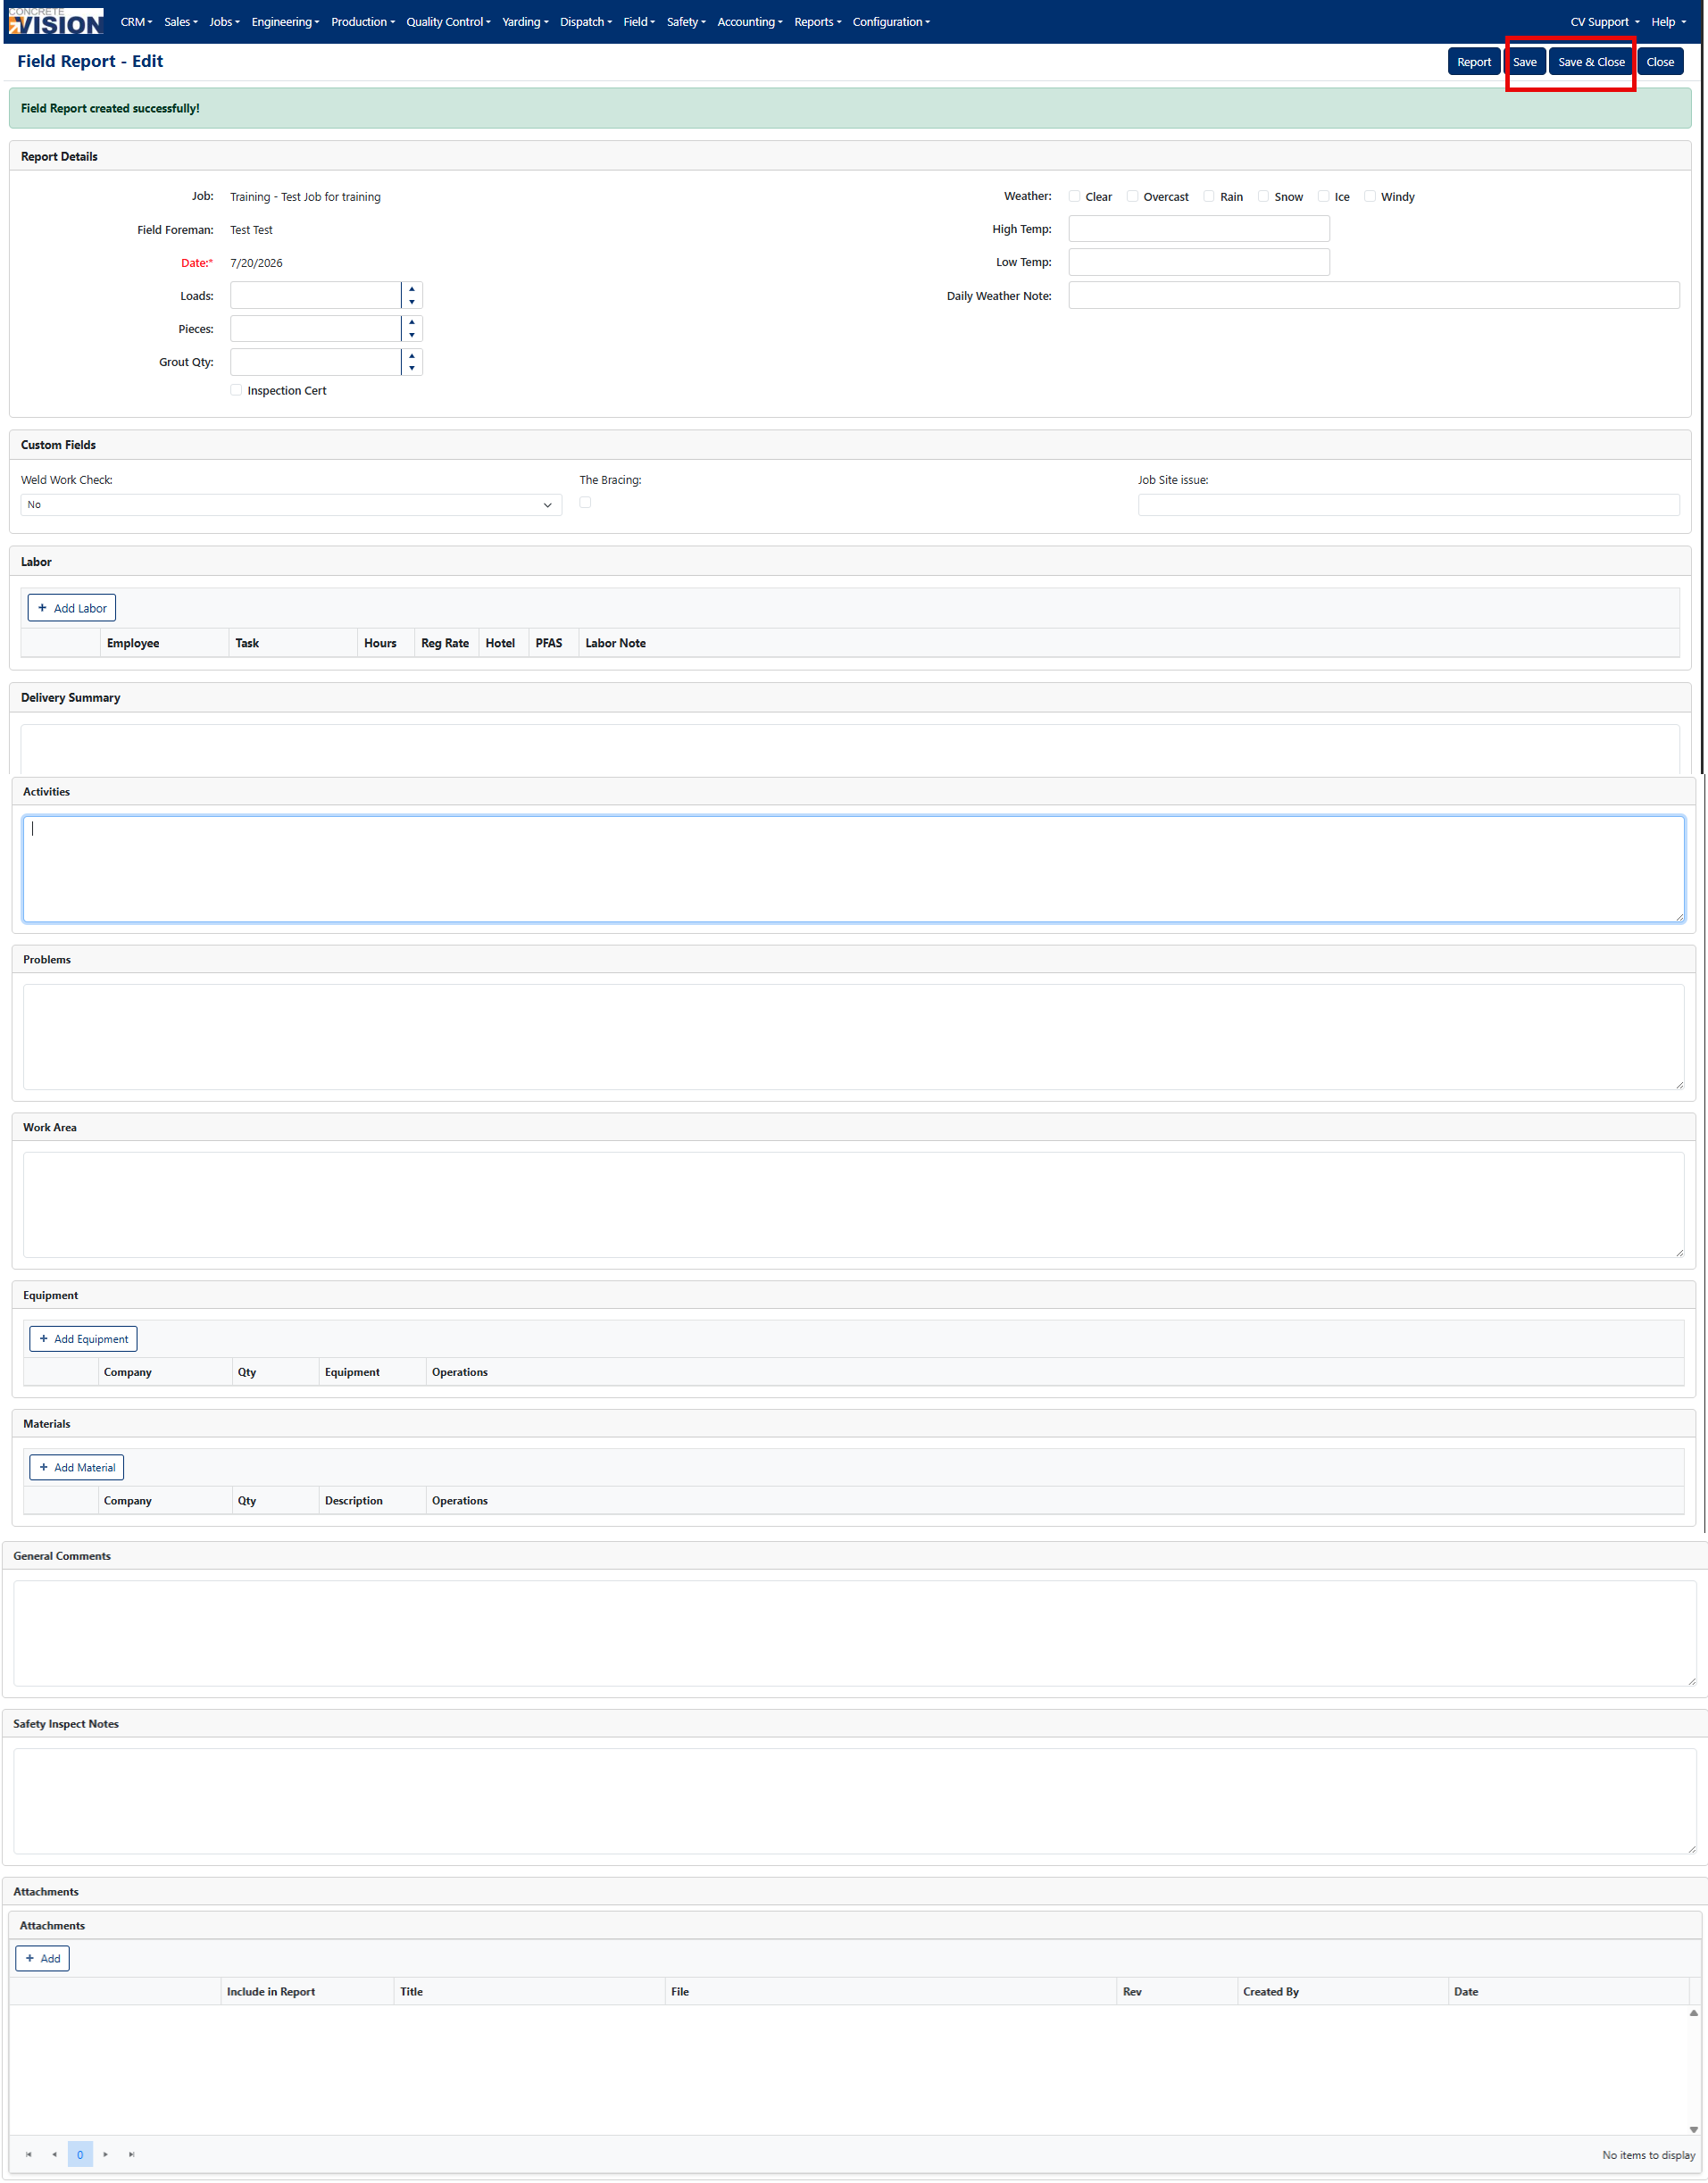
Figure 4
Editing a Field Report
From the Field Reports screen (Figure 2):
- Click on the Edit icon (Green box, Figure 2) beside the field report to modify.
- Make any necessary changes on the Field Report - Edit screen (Figure 4).
- Click the Save button to save the report or the Save & Close button to save the report and return to the previous screen (Red box, Figure 4).
Creating a PDF of an Individual Field Report
From the Field Reports screen (Figure 2):
- Click on the Report icon (Blue box, Figure 2) beside the field report.
- A pdf generated for that specific field report will download.
Deleting a Field Report
From the Field Reports screen (Figure 2):
- Click on the Delete icon (Red box, Figure 2) beside the field report to delete.
- Click the Ok button on the popup window to confirm deletion (Figure 5).
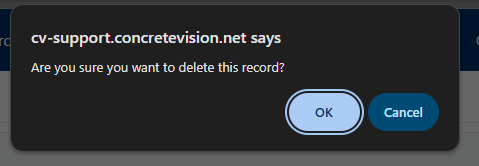
Figure 5
Adding an Attachment to a Field Report
From the Field Reports screen (Figure 2):
- Click on the Attachment icon (Purple box, Figure 2) beside the field report to add an attachment to. A Field Pictures screen will pop up (Figure 6).
- On the Field Pictures screen, click the Add button in the upper left (Red box, Figure 6). An Add Attachment screen will pop up (Figure 7).
- Give the attachment a title.
- Use the Choose File button to upload the attachment.
- Click the Upload Button (Green box, Figure 7). The attachment will be added to the field report.
- Click the Close button (Green box, Figure 8).
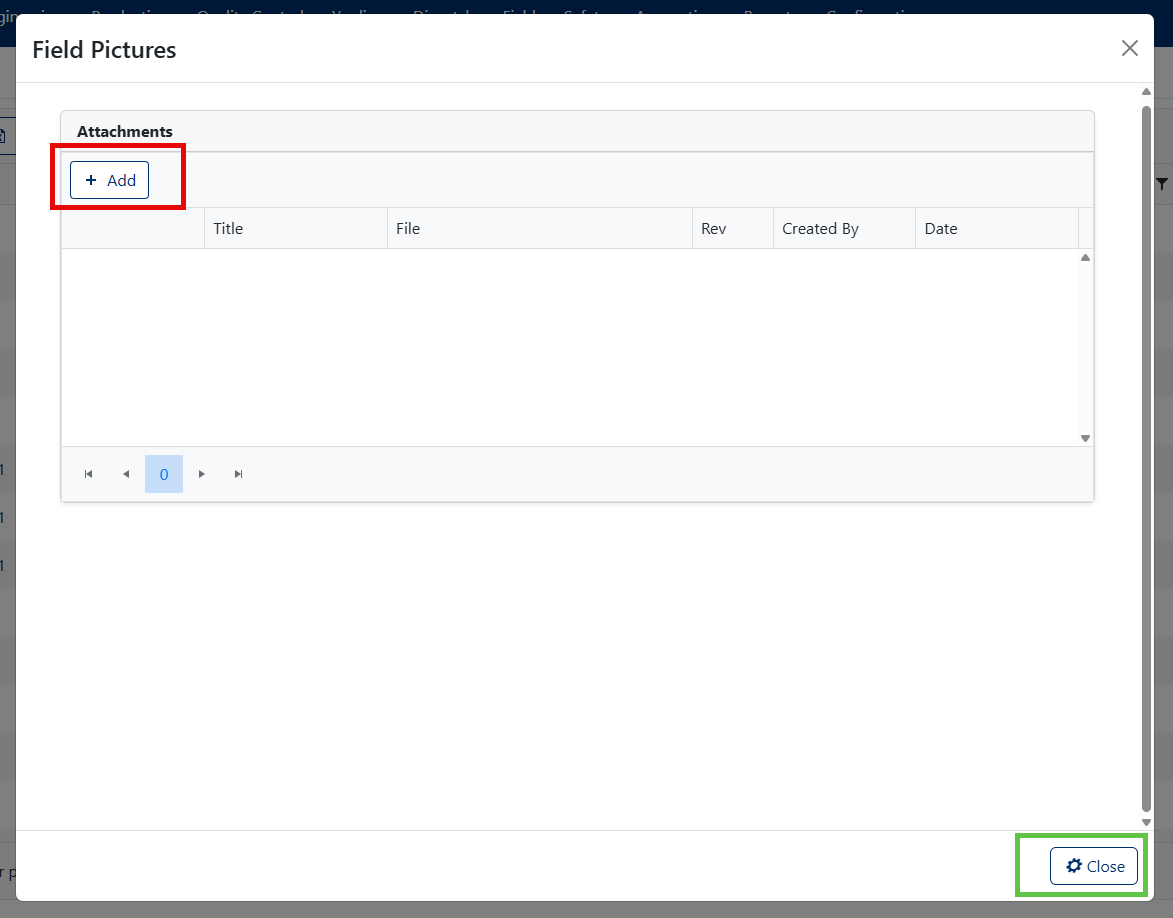
Figure 6
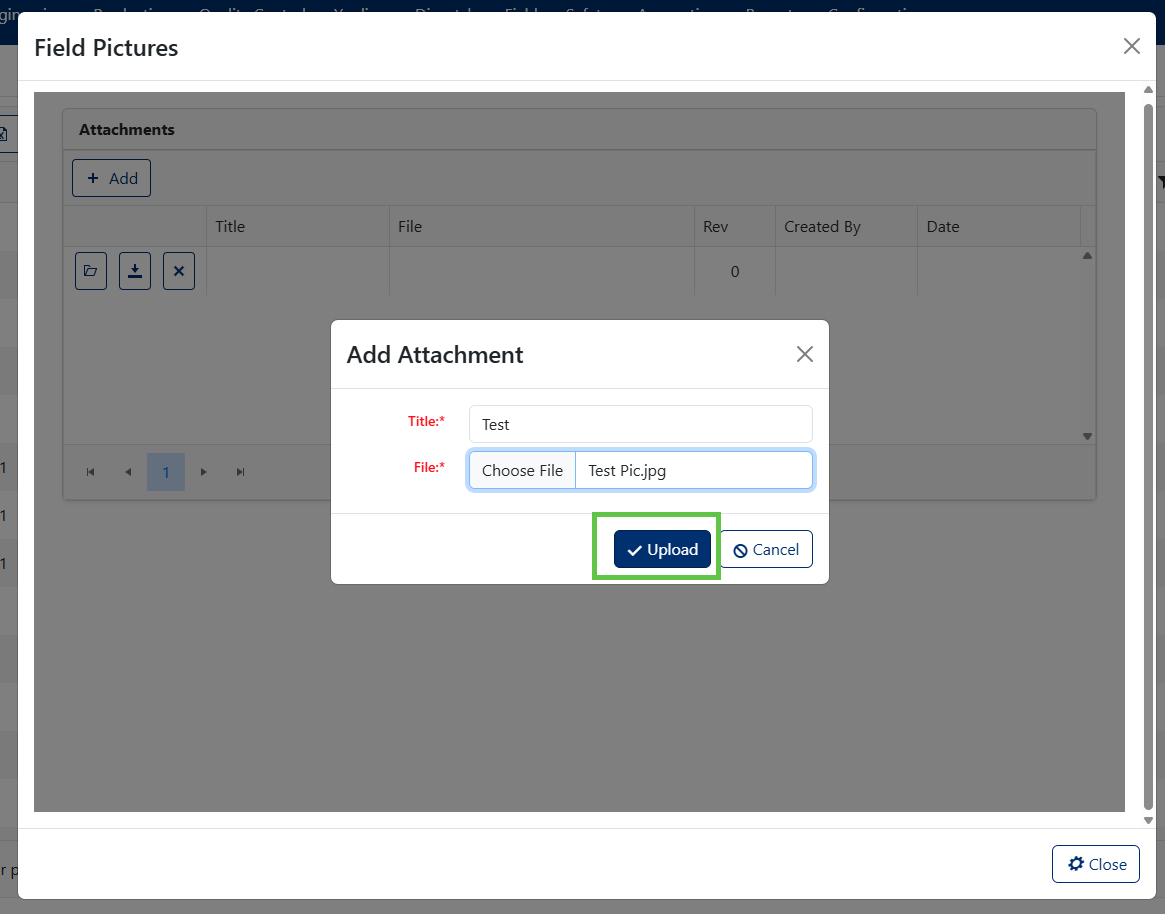
Figure 7
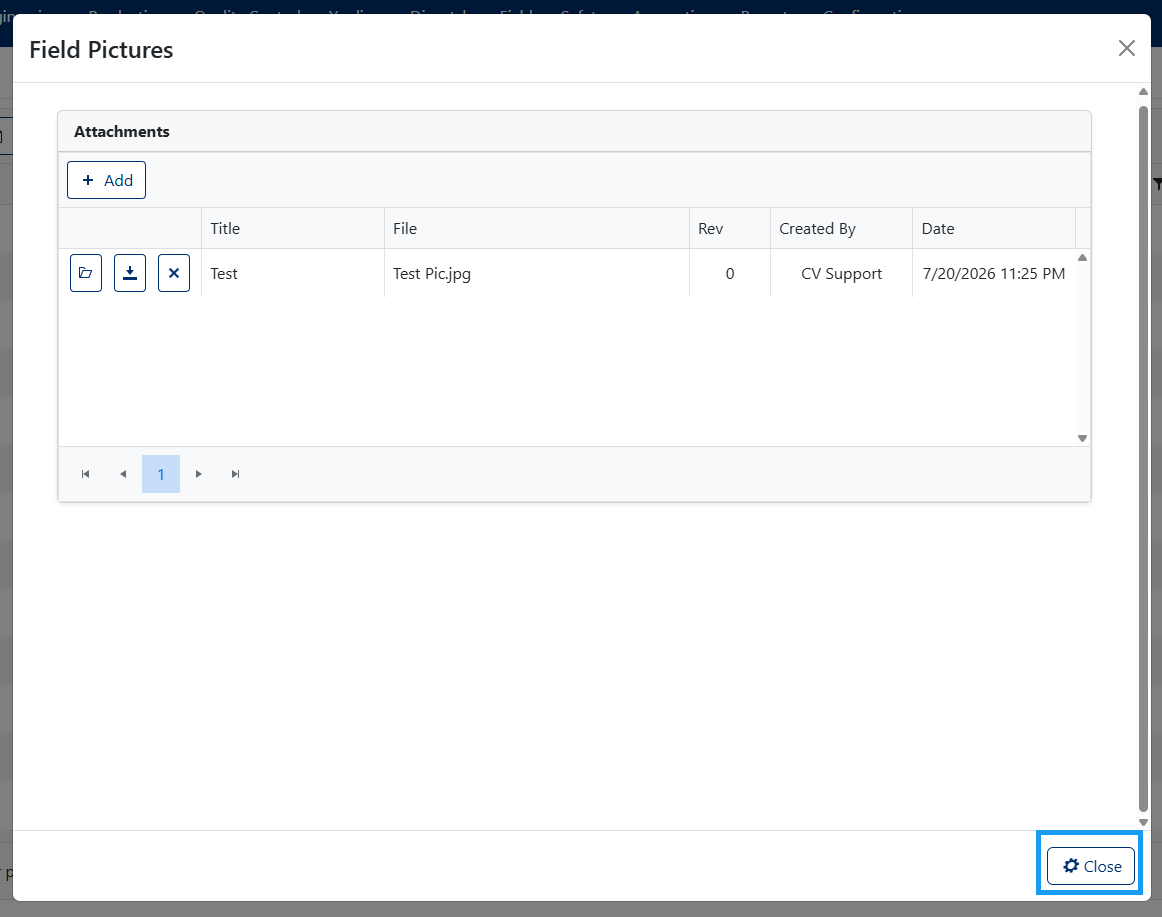
Figure 8
Exporting the Field Report Table to PDF
From the Field Reports screen (Figure 2):
- Click on the Export to PDF button (Yellow arrow, Figure 2).
- The field report table will download as a pdf.
Exporting the Field Report Table to Excel
From the Field Reports screen (Figure 2):
- Click on the Export to Excel button (Blue arrow, Figure 2).
- The field report table will download as a .xlsx file.
Was this article helpful?
That’s Great!
Thank you for your feedback
Sorry! We couldn't be helpful
Thank you for your feedback
Feedback sent
We appreciate your effort and will try to fix the article