Overview
Create custom safety forms employees can complete and submit for review. Custom safety forms marked as "Active" will be added to the Safety Module menu (Figure 1). Custom safety forms are created and managed through the Safety Forms screen.
Note: You need to have a Safety team setup or at least 1 person setup for the Safety Module to work correctly.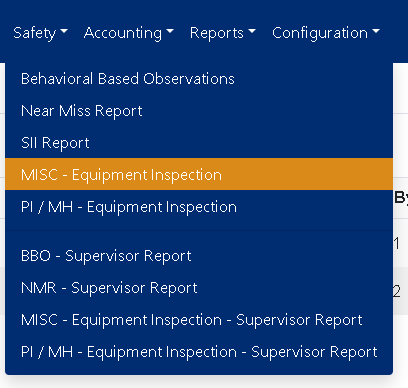
Figure 1
Accessing the Screen
Navigate to Configuration -> Safety Setup -> Safety Forms from the main menu (Figure 2).
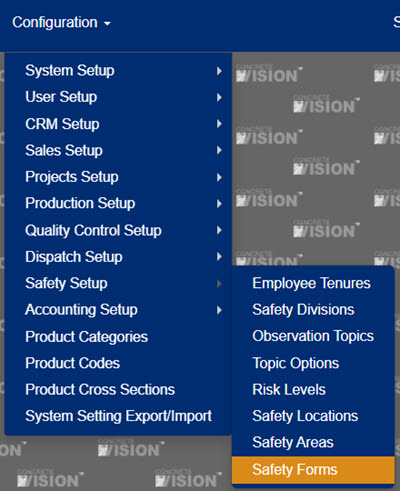
Figure 2
Using the Safety Forms Screen
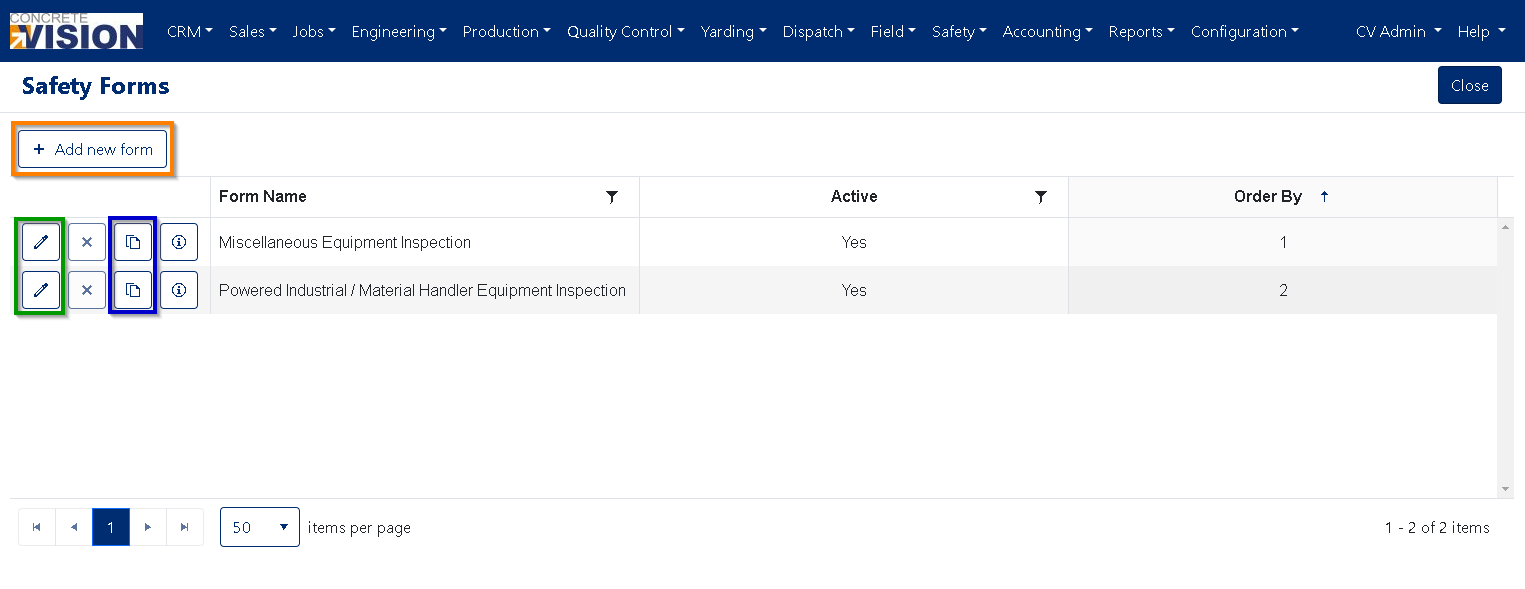
Figure 3
Add a Safety Form
From the Safety Forms screen (Figure 3):
- Click on the Add new form button (orange box in Figure 3).
- A new form will open with the preset default items included (Figure 4).
Note: How to build a custom safety form is explained later in this article.
Edit a Safety Form
From the Safety Forms screen (Figure 3):
- Click on the Edit icon (green box in Figure 3) to the left of the form to edit. This opens the Edit Safety Form screen (Figure 4).
- Make needed edits.
- Click the Save button to save changes or the Save & Close button to save changes and return to the Safety Forms screen.
Delete a Safety Form
From the Safety Forms screen (Figure 3):
- Click on the Delete icon to left of the form to delete.
- Click Okay on the popup to confirm deletion.
Note: Safety Forms with submitted items cannot be deleted.
Duplicate a Safety Form
From the Safety Forms screen (Figure 3):
- Click on the Duplicate icon (purple box in Figure 3) to the left of the form to duplicate. This will make and open a copy of the safety form.
View Safety Form Audit Information
From the Safety Forms screen (Figure 3):
- Click on the Info icon to the left of the form. This opens a modal containing Created By, Date Created, Modified By and Date Modified information.
Understanding Safety Form Sections
Safety forms have four sections:
- Safety Form Title, Menu Item Name, Order By, and Active (orange box in Figure 4)
- Safety Form Items (purple box in Figure 4)
- Safety Form Options (blue box in Figure 4)
- Safety Form Recipients (green box in Figure 4)
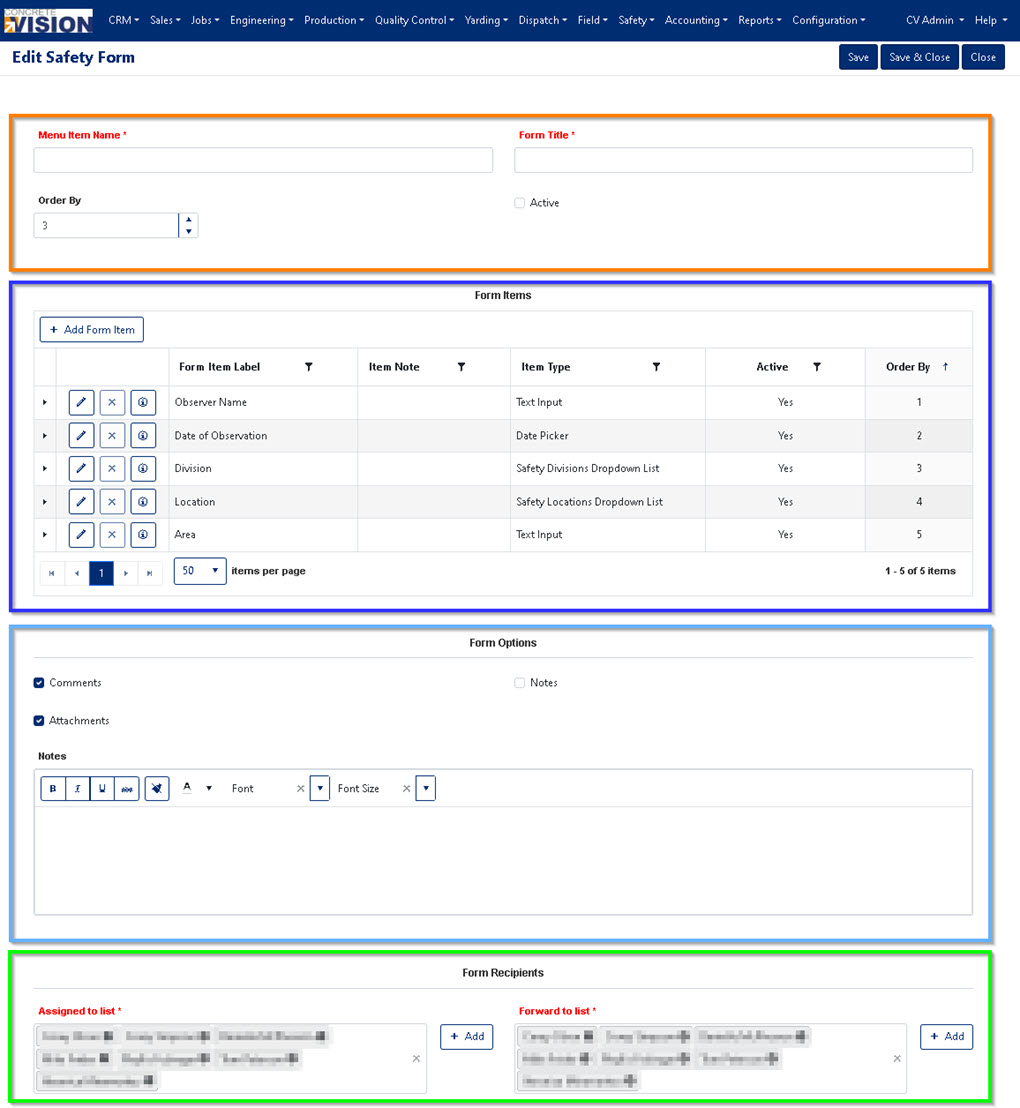
Figure 4
Menu Item Name, Form Title, Order By, and Active Section
(Figure 5)
- Menu Item Name: Used as the safety form name in the Safety Module dropdown menu.
- Form Title: Used for the safety form page title (orange box in Figure 6).
- Order By: Used to determine the display order within the Safety Menu.
- Active checkbox: Determines whether the Safety Form is shown within the Safety Menu.
Note:
- The Supervisor Report screen for each report uses the Menu Item Name suffixed by " - Supervisor Report"
- Safety Forms cannot be made Active if the minimum Required Items are not found. (See Required Items for Safety Form activation)
- If a Safety Form with submitted items is disabled, the "Safety Form Name - Supervisor Report" menu item will remain.

Figure 5
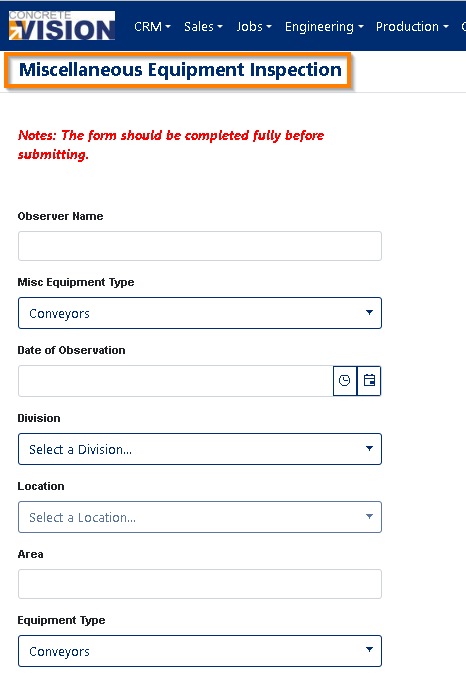
Figure 6
Safety Form Items Section
All Safety Forms are created with five default form items (Figure 7). These items cannot be removed or disabled.
- Observer Name: Text Input field
- Date of Observation: Date/Time selection field
- Division: Dropdown list comprised of the Safety Divisions (set up in Configuration -> Safety Setup -> Safety Division)
- Location: Dropdown list comprised of the Safety Locations (set up in the Configuration -> Safety Setup -> Safety Locations)
- Area: Text Input field
Safety Form items may have parent -> child -> sub item relationships, allowing Safety Forms to have form field item groups and dependencies.
- Group example: Equipment type -> Forklift
- Parent Items: Cannot be deleted if children or sub items exist.
- Dependent Items: When the form is being filled out, dependent items are hidden until the parent choice is selected.
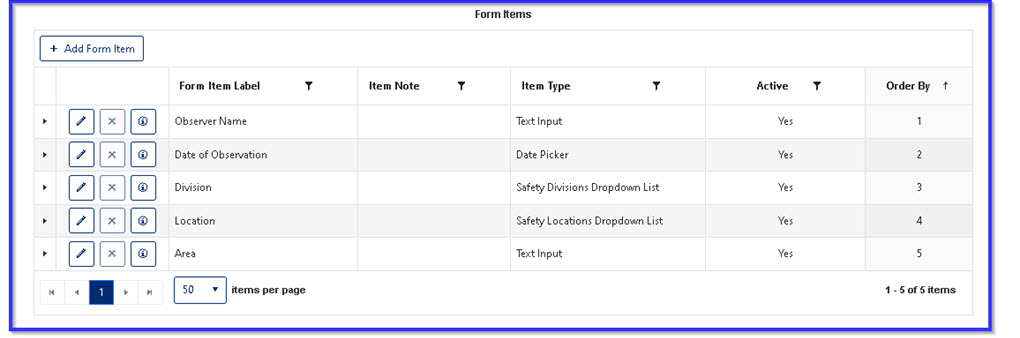 Figure 7
Editing a Safety Form Item
Refer: Form Builder Items
- Click the Edit icon (green box in Figure 8) to the left of the item to edit. This will open the Edit modal box.
- The editing modal box differs based on the form item type.
Note: Please refer to the Understanding Form Item Types section below for available form item type options.
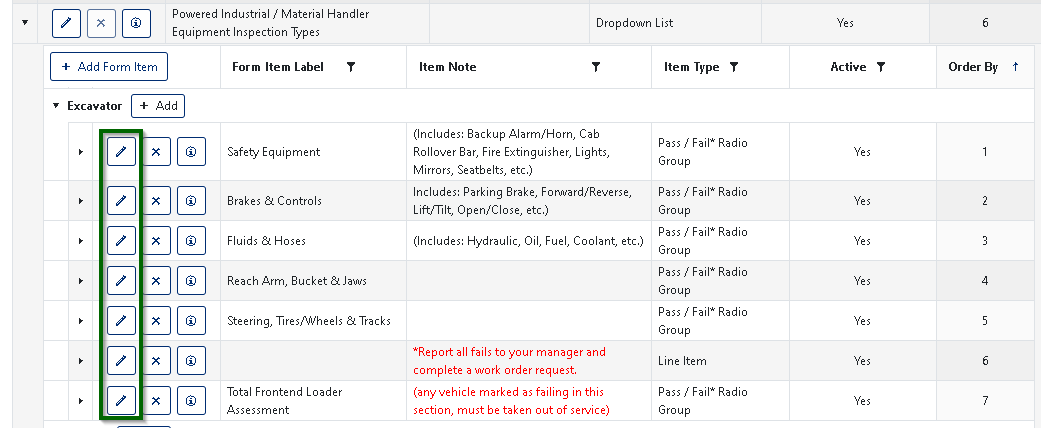
Figure 8
Deleting a Safety Form Item
- Click the Delete icon (red box in Figure 9) to the left of the item to remove.
- Click Okay in the popup window to confirm deletion of item.
Note: Default and parent form items cannot be deleted.
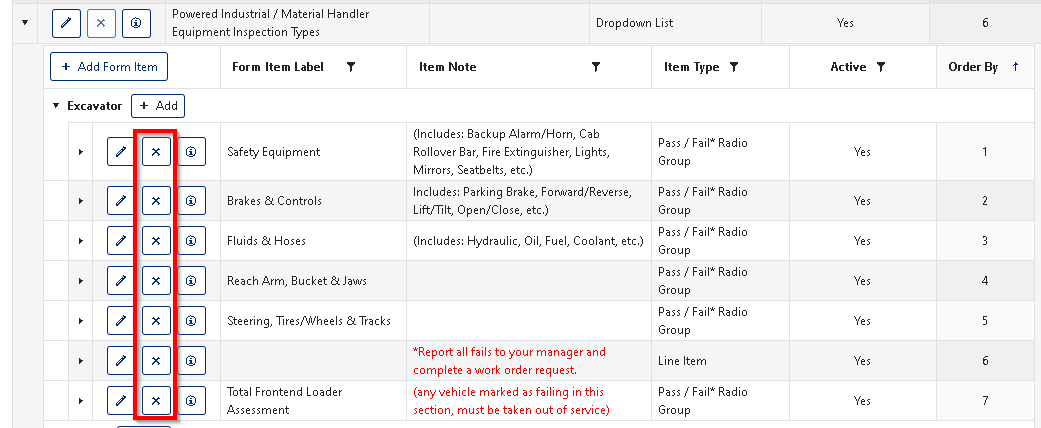
Figure 9
Safety Form Options Section
(Figure 10)
- Attachments checkbox: Allows ability to attach files to the safety form before submitting.
- Comments checkbox: Includes a text area to leave any observations for the Safety Team.
- Notes checkbox and text area: Text added to the Notes Rich text editor will be display at the top of the form. IE: instructions or notes about filling out the Safety Form.
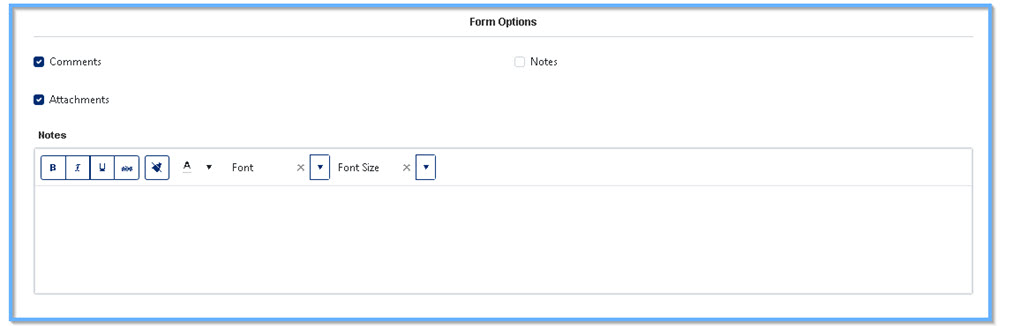
Figure 10
Safety Form Recipients Section
(Figure 11)
- Assigned to list: This multi-select item builds a dropdown list of contacts to choose from as the primary recipient(s) of the form.
- By default the Safety Team members are all preselected as possible recipient options.
- Click the [+ Add] button (Figure11) to the right of the multi-select control to add other company contacts (Figure 9) not found as part of the Safety Team.
- Forward to list: This multi-select item builds a dropdown list of contacts to choose from to forward the form to.
- By default the Safety Team members are all preselected as possible Forward to options.
- Click the [+ Add] button (Figure 11) to the right of the multi-select control to add other company contacts (Figure 12) not found as part of the Safety Team.

Figure 11
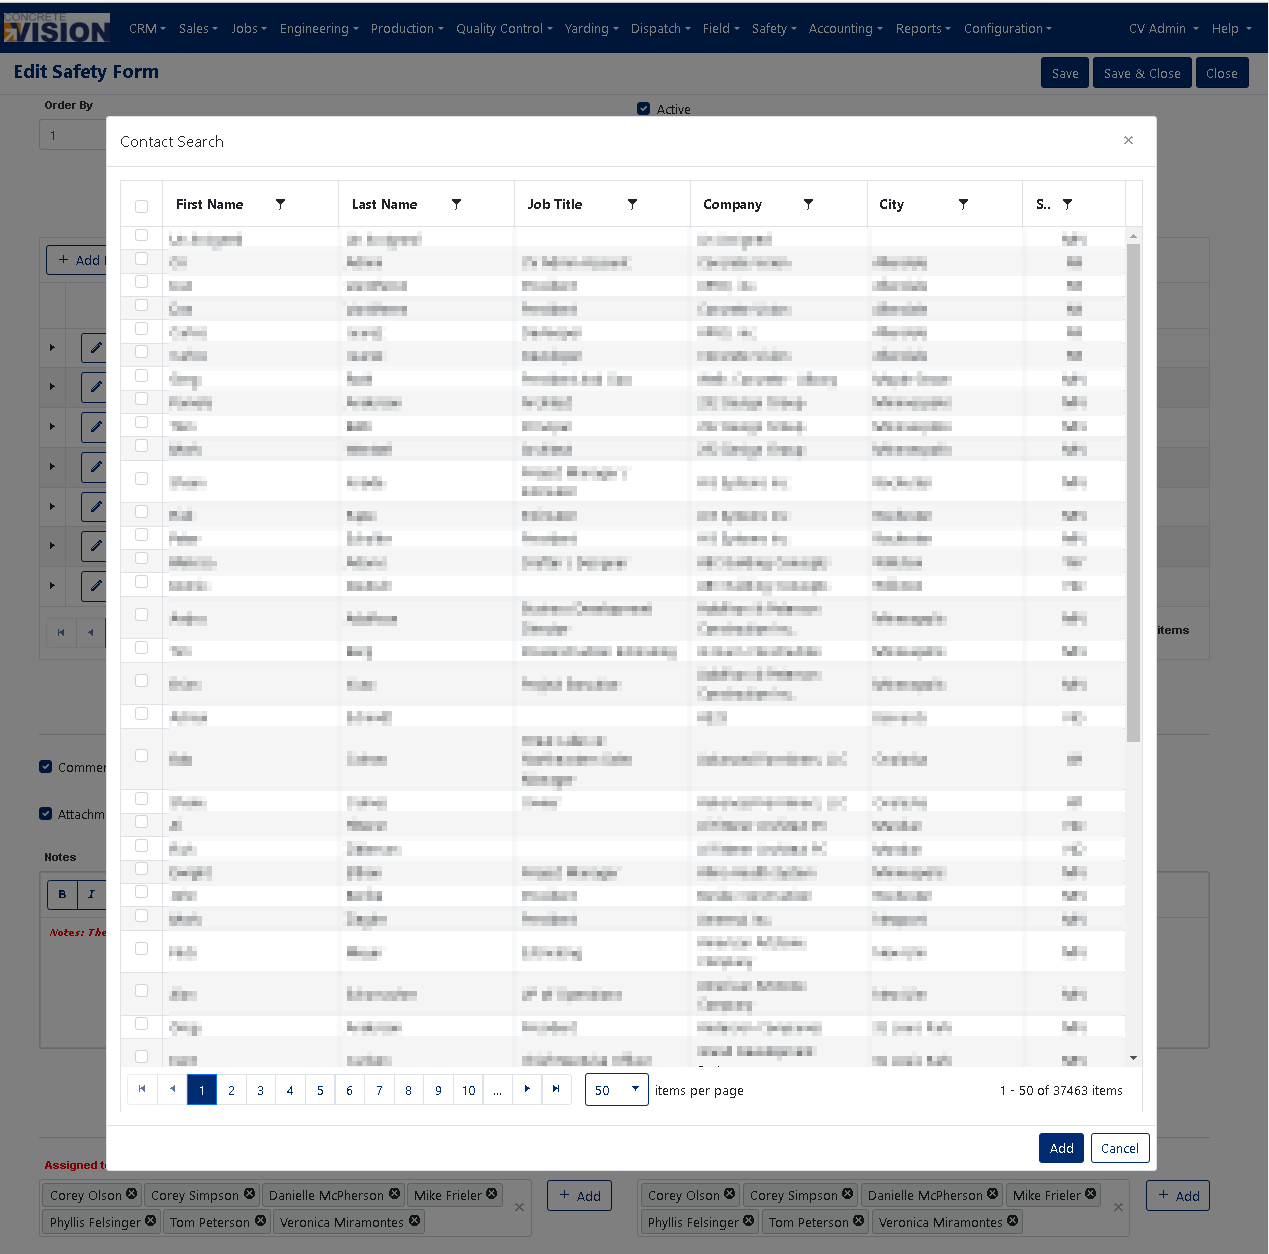 Figure 12
Understanding Form Item Types
The following are form item types that can be added to safety forms created in Concrete Vision.
Checkbox
Allows user to select applicable items, multiple if needed, in a group of options on a form.
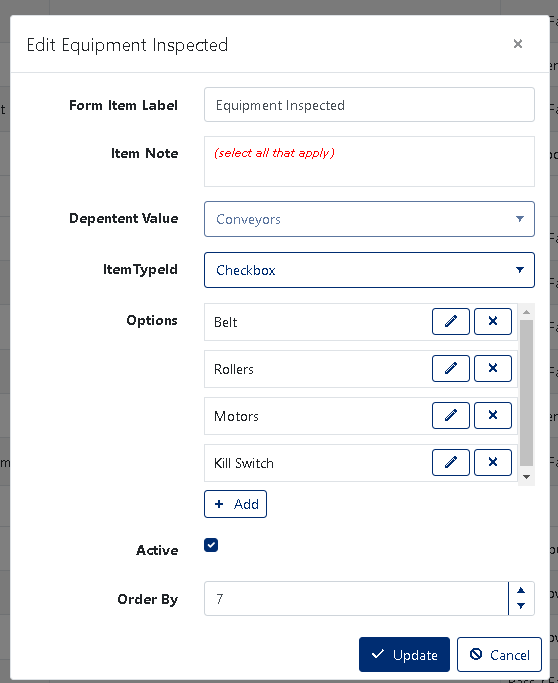
Checkbox - Edit view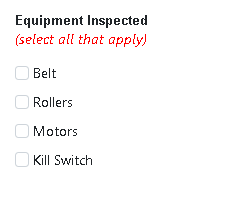
Checkbox - Submission view
Date Picker
Allows user to enter a Date value on a form.
Date Time Picker
Allows user to enter a Date/Time value on a form.
Dropdown List
Allows user to select a single option from a list of options. This item type has a cascade function which is used to show/hide dependent form field items.
Note If an Option is used as a dependency: the Option cannot be deleted (red outline below), and the Input Type cannot be changed.
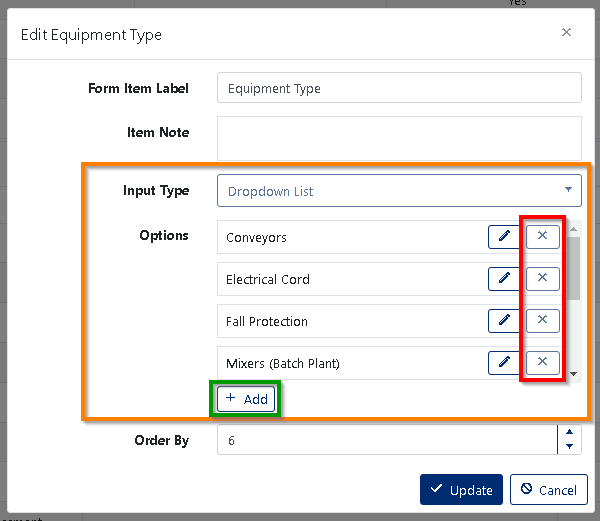
Dropdown List - Edit view
Radio List
Allows user to select a single option from a group of options.
Text Area
Allows user to enter multiple lines of text.
Text Input
Allows user to enter a single text value.
Email Input
Allows user to enter an email address, but cannot be used to include email recipients
Numeric Input
Allows user to enter numeric values.
Telephone Input
Allows user to enter telephone number values.
Section Header
Defines a section header for the form.
Image
Used to show an image above / below / between form field items.
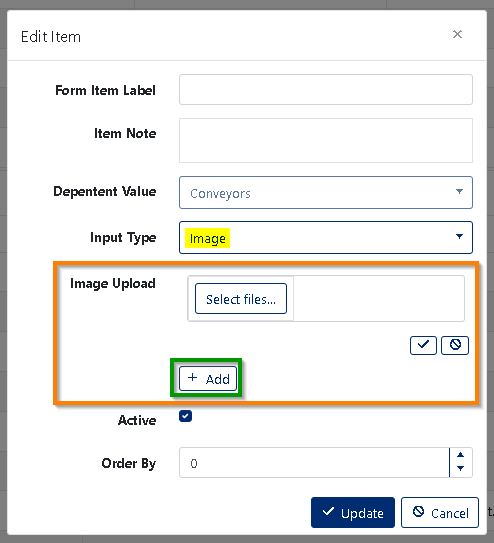
Image - Edit view
Line Item
Used to show a text line above / below / between form field items. The line item allows setting the text styles Bold, Italic and choosing between three text colors (Green, Red, Black)
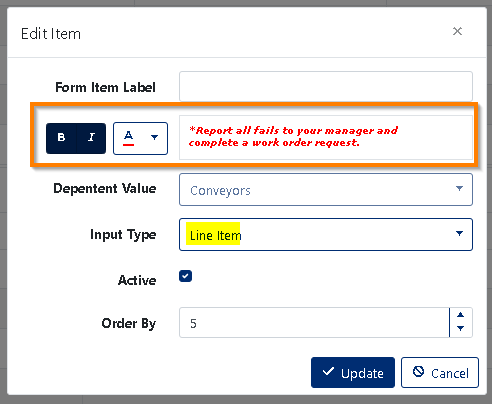
Line Item - Edit view
Pass / Fail / N/A Radio Group
Used to expedite the creation of Safety Forms
Pass / Fail Radio Group
Used to expedite the creation of Safety Forms
No / Yes
Used to expedite the creation of Safety Forms
Required Items for Safety Form Activation
A top level form item with a label containing the word "Type" (Figure 4)
- Click the [+ Add Form Item] button (Figure 4). This will open the Add New modal box. (Figure 13).
- Enter the form label. Ex. "MISC Equipment Type", "Type"
- Select Dropdown List for Input Type. The Options section for adding the types of equipment will display.
- Click the [+ Add] button.
- Enter the NAME for the option.
- Click the Update button to save the new dropdown list option.
- Continue adding any number of options needed. Minimum 1
- Click the Update button (green box in Figure 13).
A child form item with a label containing the words "Total" & "Assessment"
- Click the arrow to the left of the "Equipment Type" (orange box in Figure 14).
- Click the [+ Add Form Item] button within the "Equipment Type" group (green box in Figure 14). This will open the Add New modal box (Figure 15).
- Enter the Form Item label. Ex. Total Conveyor Assessment
- Select the Dependent Value (purple box in Figure 15).
- Select one of the Pass / Fail radio groups for the Input Type.
- Click the Update button (green box in Figure 15).
Some selection must be made to both the Assigned to list and the Forward to list.
Note: These two requirements are needed for the submitted Safety Form Supervisor Reports
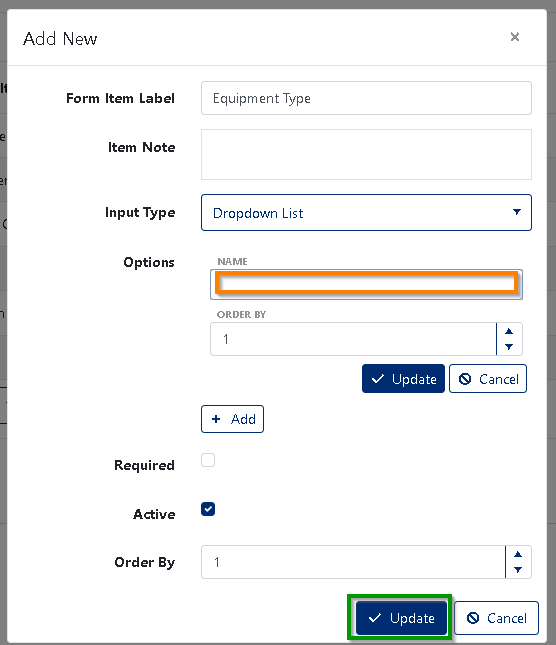
Figure 13
 Figure 14
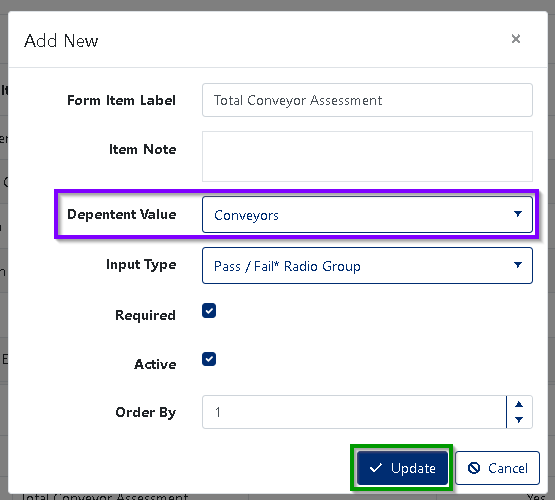
Figure 15
Was this article helpful?
That’s Great!
Thank you for your feedback
Sorry! We couldn't be helpful
Thank you for your feedback
Feedback sent
We appreciate your effort and will try to fix the article