Overview
The Items (Item Setup) screen is used to configure the library of items pulled from for estimating in CV.
Accessing the Item Setup Screen
Navigation to Accounting > Inventory > Item Setup through the main menu (Figure 1).
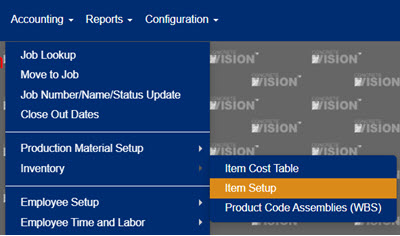
Figure 1
Using the Item Setup Screen
The Items (Item Setup) screen (Figure 2) is where you can edit, add, and view Items used in estimating.
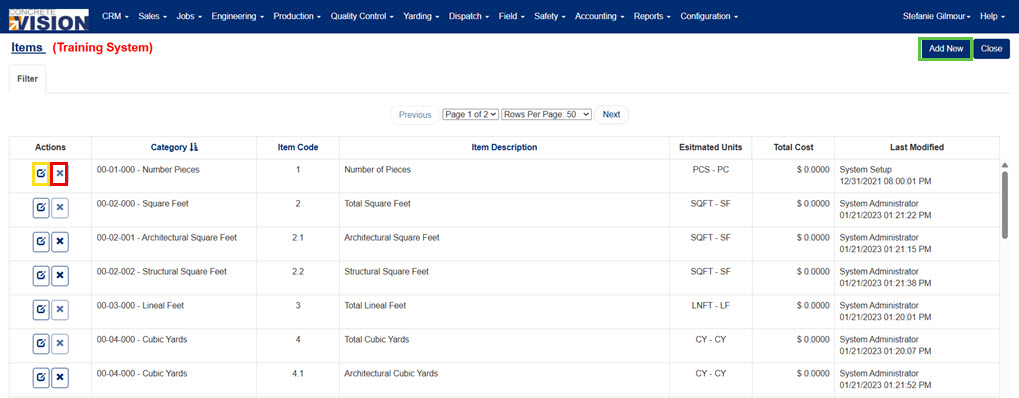
Figure 2
Add an Item
To add a new item to the Items screen:
- Click the Add New button (green box in Figure 2). The Items Add / Edit screen (Figure 3) will appear.
- Select a Category.
- Enter a code.
- Enter a description
- You can enter a misc. description.
- You can enter a UPC.
- Enter or change the waste factor.
- Select a unit of measure.
- You can enter a part number.
- You can change the weight.
- You can change any of the items on the Category table.
- To add the item and migrate to the edit screen of the newly added item click the Save button (green box in Figure 3).
- To add the item and migrate back to the main Items screen click the Save & Close button (red box in Figure 3).
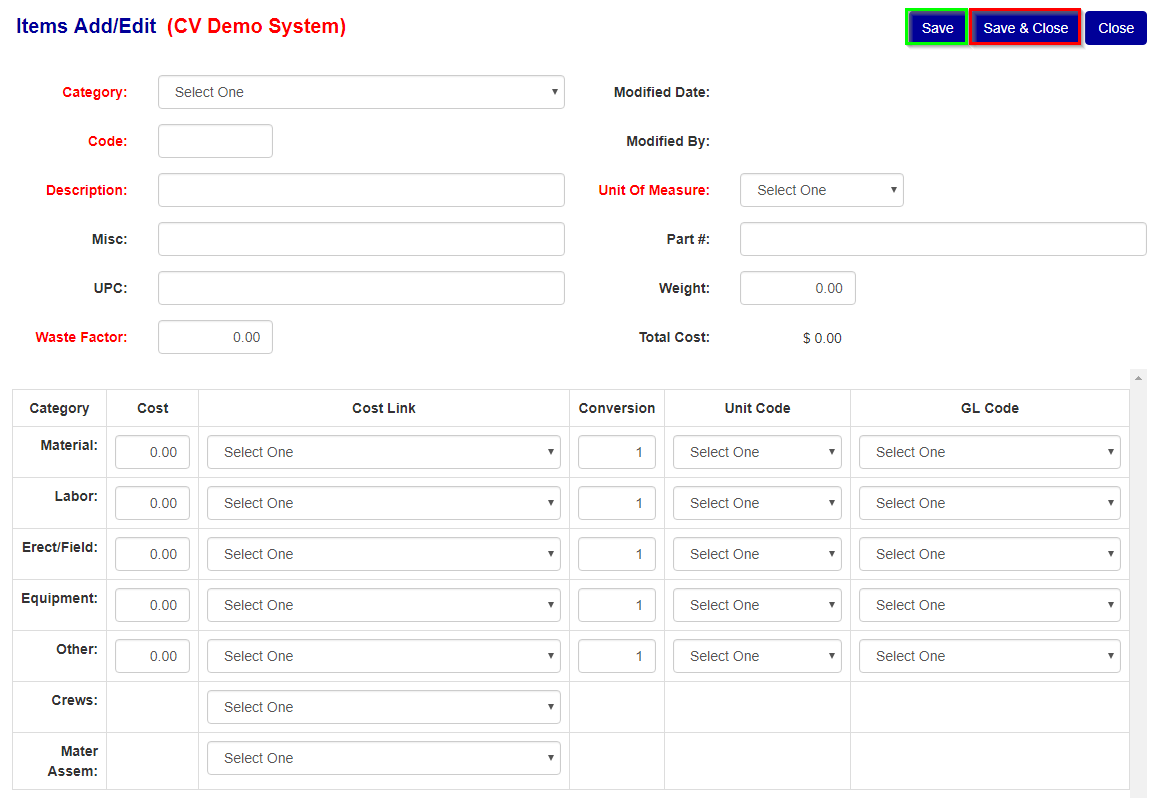
Figure 3
Edit an Item
To edit an item from the Items screen (Figure 2):
- Click the Edit icon (yellow box in Figure 2) beside the item to edit.
- Update any input values.
- Click the Save button (green box in Figure 3) to save changes or Save & Close button (red box in Figure 3) to save changes and return to the previous screen.
Delete an Item
To edit an item from the Items screen (Figure 2):
- Click the Delete icon(red box in Figure 2) beside the item to delete.
- Click the OK button in the dialogue box that appears to confirm deletion of the record.
Note: If an item is being used in CV, the Delete icon will be greyed out and the item cannot be deleted.
Sorting Items
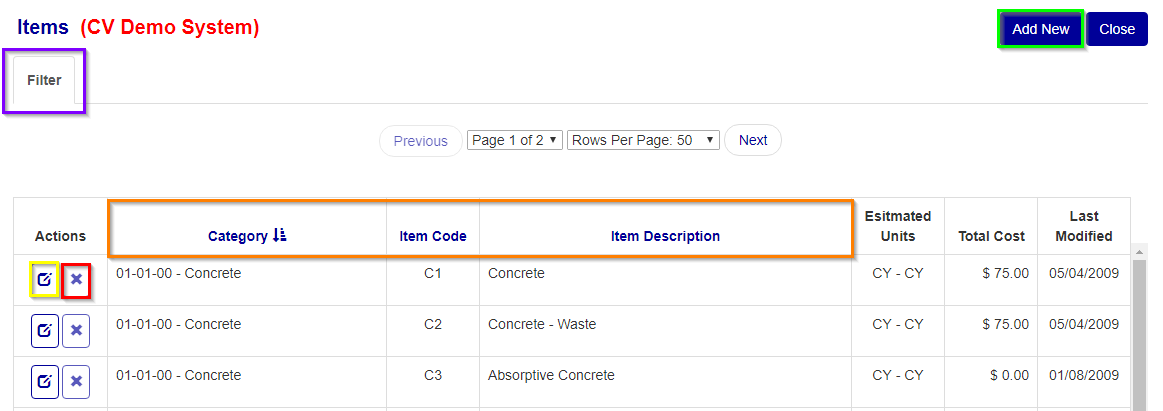
Figure 4
** The currently selected heading to sort by will have the sort by icon next to it ( )
)
- Click any of the headings (orange boxes in Figure 4) to sort the table by that headings category.
- Click the same heading again to change the sort by function to be descending instead of the default ascending.
Filtering Items
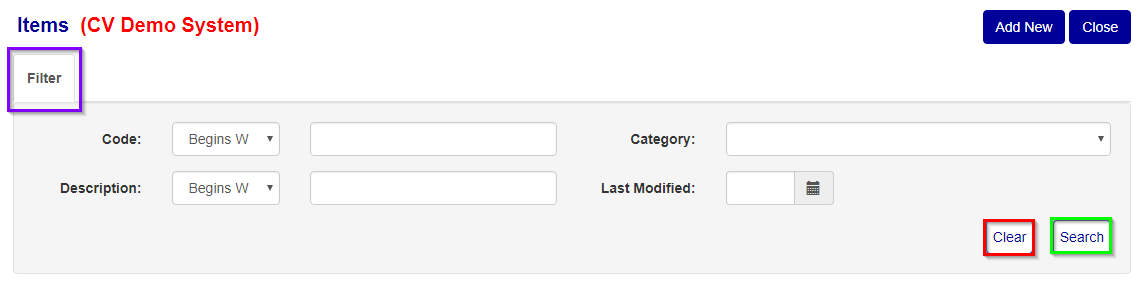
Figure 5
** searching and clearing the filter leaves the current screen, so ensure you have saved all changes you wish to keep before completing one of these actions.
- Click the Filter button (purple box in Figure 4) to open the filter menu (Figure 5) to search for specific results.
- You can enter, change, and select any of the inputs/items to obtain specific results or fewer.
- To clear/reset a current filter, click the Clear button (red box in Figure 5).
- To re-generate the table using the filter, click the Search button (green box in Figure 5).
- To close/hide the filter, click the Filter button again (purple box in Figure 5).
Was this article helpful?
That’s Great!
Thank you for your feedback
Sorry! We couldn't be helpful
Thank you for your feedback
Feedback sent
We appreciate your effort and will try to fix the article